
Think of your home’s crawl space like a secret room under your house. It’s hidden and does a big job keeping your home stable. But when water sneaks in, it can cause problems. That’s where a crawl space French drain can help!
To install a French drain in the crawl space, dig a trench around the crawl space, so that it slopes away from the house. Lay a pipe with holes in it in the trench, slanting it so water flows away. Cover it with gravel, use filter fabric to stop clogs, and fill the trench with dirt, keeping the slope away from the crawl space. This keeps water out and stops moisture problems.
Don’t worry if it sounds complicated; I’m here to help. In this DIY guide, I’ll show you how to install a French drain in crawl space, explaining each step in a simple way.
With some effort and the right tools, you can turn your damp crawl space into a dry, comfy area. This will keep your home strong for a long time.
I have also shared other effective methods to fix bouncy floors other than installing french drain. If your crawl space is also having moisture related issues, this article will definitely be helpful for you.
Table of Contents
- 1 How To Install French Drain In Crawl Space?
- 1.1 Step 1: Gather The Supplies
- 1.2 Step 2: Plan and Mark the Trench Path
- 1.3 Step 3: Dig the Trench
- 1.4 Step 4: Create Proper Slope
- 1.5 Step 5: Install the Drain Pipe
- 1.6 Step 6: Add Gravel
- 1.7 Step 7: Apply Filter Fabric
- 1.8 Step 8: Backfill with Soil
- 1.9 Step 9: Cover with Landscape Fabric
- 1.10 Step 10: Final Check
- 1.11 Step 11. Backfill Completely
- 1.12 Step 12. Clean Up
- 2 Final Thoughts
- 3 FAQs Regarding Installation Of French Drain In Crawl Space
- 3.1 Q. How deep should a French drain be in a crawl space?
- 3.2 Q. What is the difference between French drain and under drain?
- 3.3 Q. Where does the water from a French drain go?
- 3.4 Q. Should a French drain be inside or outside?
- 3.5 Q. What should be the slope of a French drain?
- 3.6 Q. Does a French drain include a pipe?
- 3.7 Q. How long can a french drain last?
How To Install French Drain In Crawl Space?
Moisture-related problems commonly manifest when insufficient drainage or improper grading around the house result in saturated soil or even the accumulation of standing water in the crawl space, a research study conducted by W.B. Rose, a Research Architect, and Anton Ten Wolde, a Research Physicist (1).
To fix these moisture-related problems in your crawl space, installing a French drain can be an effective solution. Here’s a step-by-step guide on how to install a French drain in your crawl space:
Step 1: Gather The Supplies
Gathering the necessary tools and materials is the first step in installing a French drain in your crawl space. Here’s a list of what you’ll need:
Tools
- Shove
- Tape Measure
- Level
- Pipe Cutter or Saw
- Wheelbarrow or Buckets
- Rake
- Utility Knife
- Safety Gear
Materials
- NDS Hydraway drain pipe
- Gravel
- Filter Fabric
- PVC Elbows and Connectors
- Landscape Fabric
- Markers or Flags
Note: Before starting the installation, check local building codes and regulations. Depending on your location, you may need a permit for this type of project.
Step 2: Plan and Mark the Trench Path
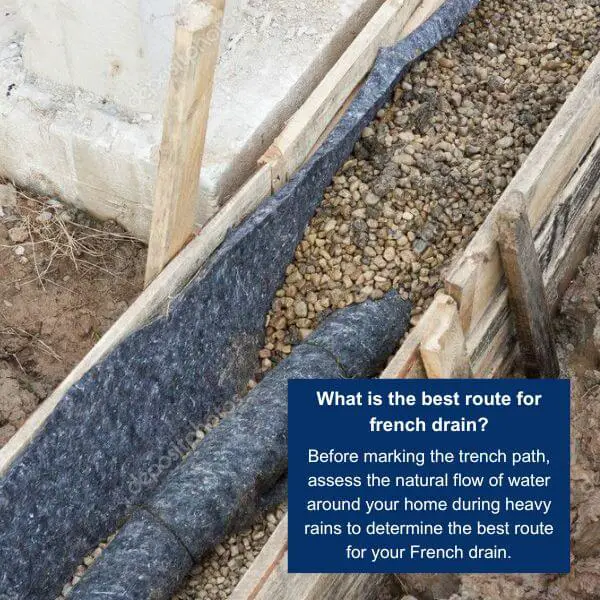
Start by planning the path for your French drain trench. You want it to slope away from your house to ensure proper drainage. Use markers or flags to outline the trench’s route, keeping it at least a foot away from the foundation walls.
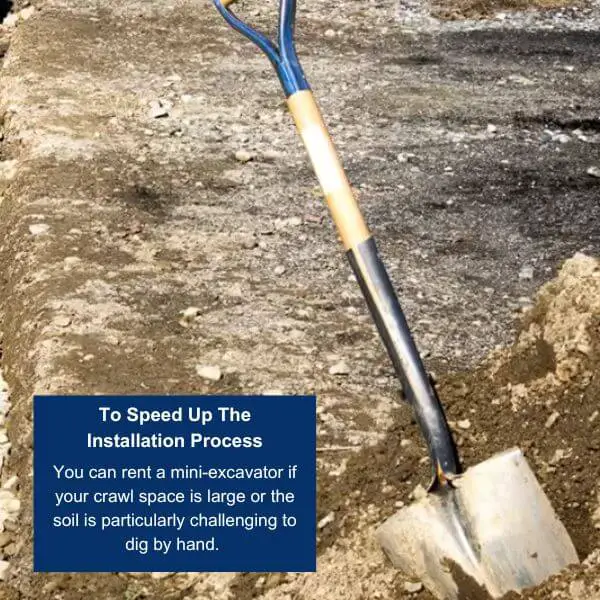
Step 3: Dig the Trench
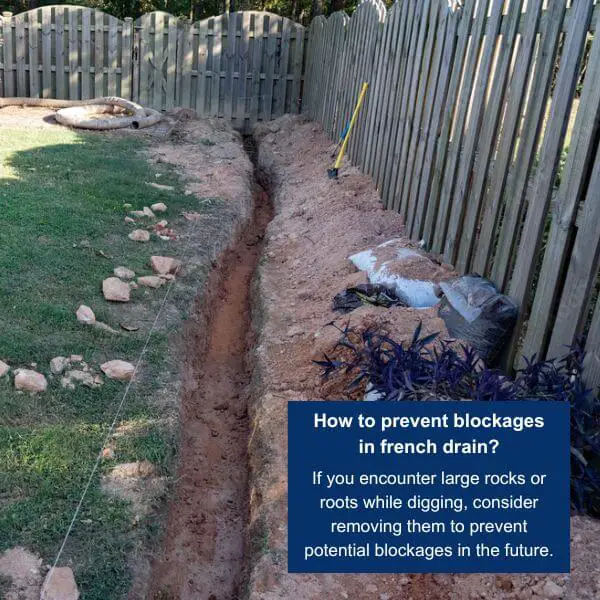
Using a shovel, dig the trench along the marked path. The depth and width of the trench may vary depending on the specific conditions of your crawl space and the recommended specifications of your chosen drain system. Typically, a depth between 8 inches and 2 feet should suffice, as advised.
Step 4: Create Proper Slope

As you dig the trench, make sure it slopes gradually away from the house. A slope of about 1/8 inch per foot is generally recommended.
This slope will ensure that water flows away from your crawl space and towards the designated drainage point.
Step 5: Install the Drain Pipe
I needed a drainage solution that would efficiently combat the moisture-related issues in my crawl space. After some research, I opted for the NDS Hydraway drain pipe, and it proved to be an excellent choice.
Firstly, its drainage efficiency was remarkable. The evenly spaced perforations on the pipe allowed water to enter swiftly and efficiently, preventing any water buildup in the crawl space.
This was a crucial feature for me because I wanted a system that would effectively keep my crawl space dry.

Durability was another major factor in my decision. Crawl spaces can be harsh environments, with moisture, soil pressure, and temperature fluctuations to contend with.
The NDS Hydraway drain pipe was more than up to the task. It’s made from high-quality materials that ensure it can withstand these challenging conditions while maintaining peak performance.
Clogs are always a concern with drainage systems, but the Hydraway drain pipe’s perforations are designed to resist them.
This feature was a relief because it meant I wouldn’t have to worry about frequent maintenance or potential blockages caused by soil or debris infiltration.
The ease of installation was the icing on the cake. I’m not a professional contractor, so having a system that was relatively easy to work with made the entire process much smoother and less daunting.
Now, let’s get back to the installation; lay the NDS Hydraway drain pipe with holes facing downward along the trench. Make sure it follows the slope of the trench. If necessary, use PVC elbows and connectors to navigate corners or turns.
PRO Tip: Along with french drain system, consider installing a sump pump in your crawl space if it is prone to severe water issues. A sump pump can help efficiently pump out collected water to prevent flooding.
Step 6: Add Gravel

Cover the drain pipe with a layer of gravel to facilitate water flow and prevent soil from clogging the drainage system. Fill the trench with enough gravel to create a 8-inch to 2-foot layer above the pipe.
Step 7: Apply Filter Fabric
Place a layer of filter fabric over the gravel to prevent soil and debris from entering the drainage system.
You can use NDS FWFF67 Filter Fabric Wrap. I personally used this filter fabric wrap in my own project and found it to be exceptionally effective.
What I particularly liked about it was its outstanding filtration capabilities, allowing water to pass through while effectively blocking soil particles and debris.

The installation process is straightforward, and it snugly wraps around the gravel-covered drain pipe, simplifying the setup.
The primary benefit of using NDS FWFF67 is its ability to prevent clogs effectively. It keeps out soil, roots, and debris, ensuring that your French drain system continues to function at its best.
This not only maintains efficient moisture diversion from your crawl space but also saves you money in the long run by reducing the need for maintenance and repairs.
Step 8: Backfill with Soil

Carefully backfill the trench with the excavated soil, ensuring that the slope away from the crawl space is maintained.
Tamp down the soil periodically to eliminate air pockets and promote proper settling.
Step 9: Cover with Landscape Fabric
To further protect the drain system and prevent clogs, cover the entire trench area with landscape fabric.
I would also recommend using Super Geotextile Non Woven Fabric for Landscaping due to its exceptional performance when I used it for my home’s crawl space french drainage system.

This fabric proved to be durable, resisting tears and degradation even in outdoor conditions.
Its ability to filter out soil particles and debris while allowing water to pass through ensures that your drain system remains clear and functional. You can secure it in place with landscape fabric pins or staples.
Step 10: Final Check
After completing the installation, double-check the slope and ensure that water will flow away from your crawl space. Inspect the drain pipe for proper alignment and connections.
Test the Drain
To ensure that your French drain is working correctly, you can perform a simple test. Pour water into the trench near the house, and observe if it flows smoothly through the drain and away from the crawl space.
Step 11. Backfill Completely

Once you’re satisfied with the drainage test, finish backfilling the trench with soil until it’s level with the surrounding ground.
Step 12. Clean Up
Remove any excess soil or debris from the crawl space and the surrounding area. Dispose of materials properly.
Final Thoughts
Turning your damp crawl space into a dry, cozy place is like solving a puzzle. You can do it yourself by putting in a French drain.
Using the right tools and following the above guide on how to install a french drain in crawl space, you’ll keep your home safe and dry for a long time.
FAQs Regarding Installation Of French Drain In Crawl Space
Q. How deep should a French drain be in a crawl space?
When constructing a French drain within a crawl space, it’s advisable to excavate a trench to a depth that falls between 8 inches and 2 feet.
However, in scenarios where you’re implementing comparable drainage systems around foundations, beneath subterranean living spaces, or at the bases of retaining walls, you may find it necessary to dig deeper trenches.
Q. What is the difference between French drain and under drain?
French drains are made to fix subsurface water issues, installed below ground to redirect groundwater and prevent flooding issues.
Underdrains, in contrast, manage surface water by utilizing gravity, using sloping pipes or channels to redirect water away from an area, useful in landscaping and construction projects to prevent surface water pooling.
Q. Where does the water from a French drain go?
In a French drain, water goes through gravel and a perforated pipe wrapped in landscaping fabric. This fabric allows water to pass while keeping out weeds and debris.
The pipe then guides the water to a designated spot in your yard or connects to the municipal sewer system, ensuring efficient drainage.
Q. Should a French drain be inside or outside?
For existing houses, it’s often more cost-effective and practical to opt for interior French drains as compared to exterior french drains.
They effectively prevent basement flooding and water damage without the complexities and expenses associated with exterior drain installation and maintenance.
Q. What should be the slope of a French drain?
To ensure efficient water drainage, a French drain should have a slope of at least 1 percent. In practical terms, this means the drain should descend at least one inch for every ten feet of drain pipe. This slope allows gravity to assist in moving water away effectively.
Q. Does a French drain include a pipe?
A French drain typically includes a pipe, often a 4″ or 6″ perforated pipe, encased in round drain rock. This pipe is essential for effectively redirecting water away from building structures and preventing water pooling.
Q. How long can a french drain last?
A French drain should work well for at least 10 years, and when you take good care of it, it can often last for 30 to 40 years.

As a co-creator of FlooringFlow.com, Emma Sophia comes on board to answer all your questions related to any flooring problems. Together with John Henry, she’s gained extensive experience in fixing many flooring problems in their own house as well as in friends and family’s. Now, she wants to share her knowledge that she gained during floor remodeling, restoring, and DIY projects.


 Guide")


