Concrete planters are a stylish and durable addition to any home or garden. They blend seamlessly with modern, minimalist, and even rustic decors, offering a versatile solution for your planting needs.

This article presents 23 unique DIY concrete planter ideas, each accompanied by a simple tutorial to inspire both novice and experienced crafters.
Table of Contents
- 1 Best Ideas For DIY Concrete Planters
- 1.1 1. Bold Geometric Beauties
- 1.2 2. Rustic Log Planters
- 1.3 3. Marbleized Elegance
- 1.4 4. Embedded Gemstone Delight
- 1.5 5. Industrial Pipe Planters
- 1.6 6. Stepping Stone Planters
- 1.7 7. Concrete Block Planters
- 1.8 8. Concrete Orb Planters
- 1.9 9. Concrete Leaf Planters
- 1.10 10. Concrete Planter Bench
- 1.11 11. Concrete Succulent Planters
- 1.12 12. Concrete Alphabet Planters
- 1.13 13. Concrete Tealight Candle Holders
- 1.14 14. Concrete Wall Planters
- 1.15 15. Concrete Bird Bath Planter
- 1.16 16. Concrete Herb Garden
- 1.17 17. Concrete Mushroom Planter
- 1.18 18. Concrete Lantern Planters
- 1.19 19. Concrete Shell Planters
- 1.20 20. Concrete Basket Planters
- 1.21 21. Concrete Trough Planters
- 1.22 22. Concrete Bicycle Planter
- 1.23 23. Concrete Swirl Planter
- 1.24 24. Concrete Pineapple Planter
- 1.25 25. Concrete Gazing Ball Planter
Best Ideas For DIY Concrete Planters
Whether you’re looking to showcase succulents, herbs, or floral arrangements, these concrete planter ideas are sure to spark your creativity and add a personalized touch to your space.
1. Bold Geometric Beauties
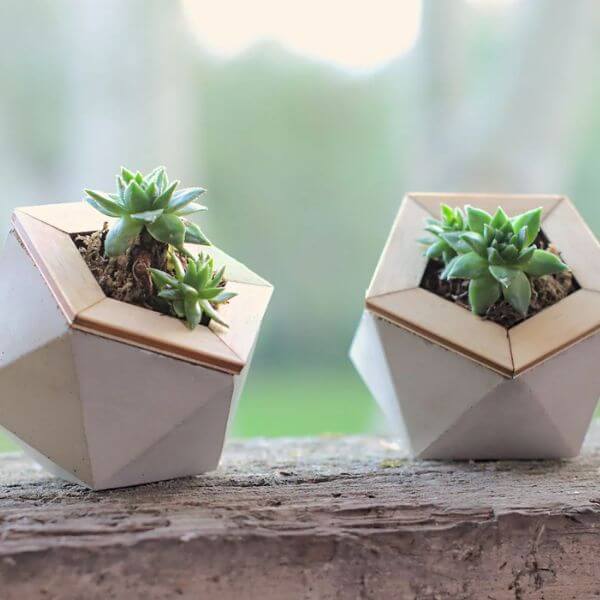
Transform your space with eye-catching geometric concrete planters. Create molds using cardboard or wooden frames in geometric shapes such as cubes, pyramids, or hexagons. Mix concrete according to package instructions, pour into molds, and let it set. Once dry, remove the molds and voila! Fill with your favorite plants for a modern touch to any room.
DIY Tutorial:
- Create a cardboard or wooden mold in your desired geometric shape.
- Mix concrete following package instructions.
- Pour concrete into the mold and tap gently to remove air bubbles.
- Let it set for 24-48 hours.
- Carefully remove the mold and sand any rough edges.
- Add soil and your favorite plants.
2. Rustic Log Planters
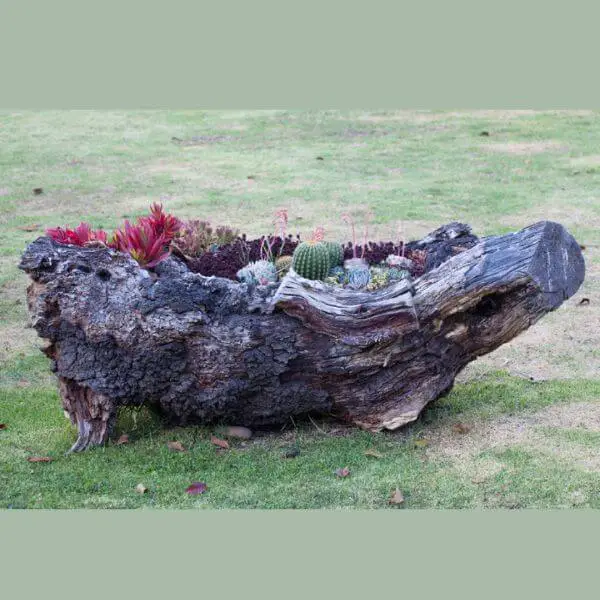
Embrace nature with rustic concrete log planters. Find a sturdy log and hollow out the center using a drill and chisel. Line the cavity with plastic wrap to prevent water damage. Mix concrete and pour it into the hollowed-out log. Allow it to set, then remove the plastic wrap and plant your greenery. These unique planters will add a touch of woodland charm to your garden or patio.
DIY Tutorial:
- Find a log with a diameter suitable for your desired planter size.
- Use a drill and chisel to hollow out the center of the log.
- Line the cavity with plastic wrap, leaving excess wrap hanging over the edges.
- Mix concrete and pour it into the hollowed-out log.
- Tap gently to remove air bubbles and smooth the surface.
- Allow the concrete to set for 24-48 hours.
- Carefully remove the plastic wrap and sand any rough edges.
- Plant your favorite greenery and enjoy your rustic masterpiece!
3. Marbleized Elegance
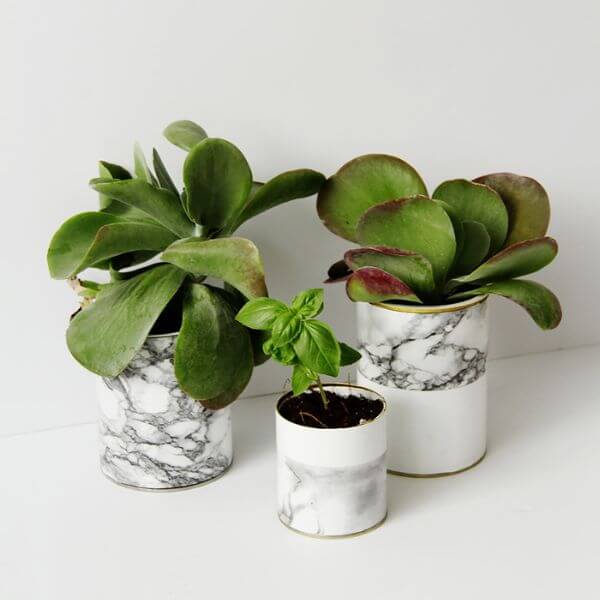
Add a touch of elegance to your space with marbleized concrete planters. Mix concrete with water until it reaches a thick, pourable consistency. Divide the mixture into smaller containers and add acrylic paint in various colors. Pour the colored concrete into a larger mold in layers, swirling them together to create a marble effect. Once set, remove the mold and display your stunning marbleized planters for all to admire.
DIY Tutorial:
- Mix concrete with water until it reaches a thick, pourable consistency.
- Divide the mixture into smaller containers.
- Add acrylic paint to each container in different colors.
- Pour the colored concrete into a larger mold in layers, swirling them together.
- Tap gently to remove air bubbles.
- Allow the concrete to set for 24-48 hours.
- Carefully remove the mold and sand any rough edges.
- Plant your favorite greenery and enjoy the sophisticated charm of marbleized concrete planters.
4. Embedded Gemstone Delight
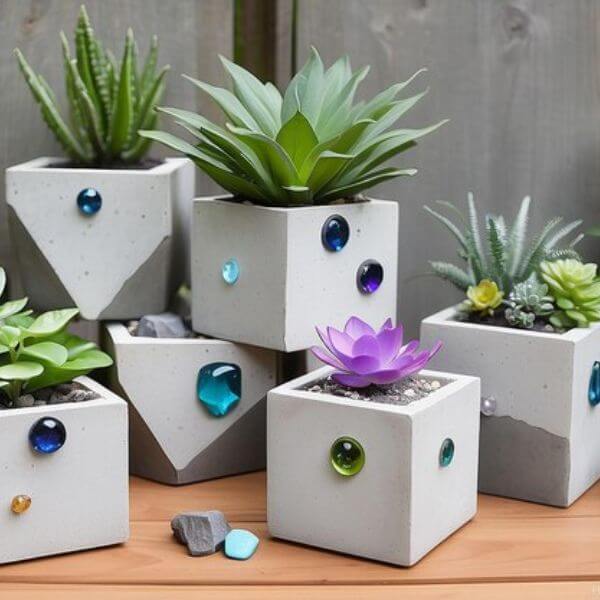
Elevate your concrete planters with embedded gemstones for a touch of sparkle and elegance. Mix concrete and pour it into small molds, halfway full. Place gemstones or glass beads into the concrete, arranging them as desired. Fill the molds with more concrete and let them set. Once dry, remove the molds to reveal your dazzling gemstone concrete planters.
DIY Tutorial:
- Mix concrete according to package instructions.
- Pour a small amount of concrete into your mold, filling it halfway.
- Arrange gemstones or glass beads on top of the concrete.
- Fill the mold with more concrete, covering the gemstones completely.
- Tap gently to remove air bubbles.
- Allow the concrete to set for 24-48 hours.
- Carefully remove the mold and sand any rough edges.
- Plant your favorite greenery and watch as the gemstones shimmer in the sunlight.
5. Industrial Pipe Planters
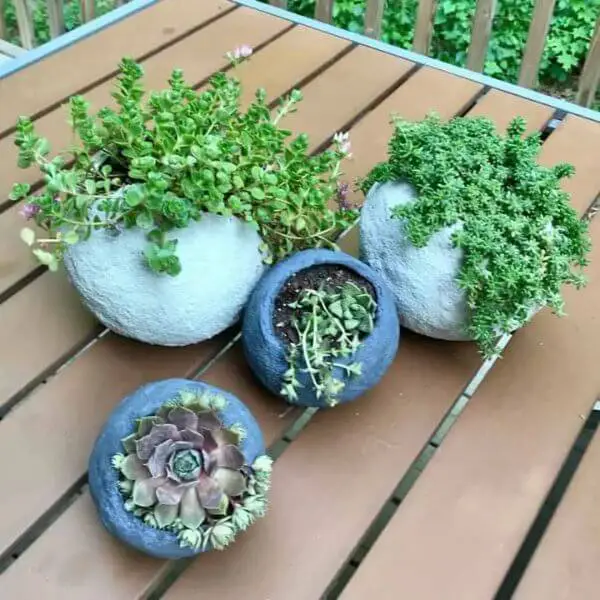
Repurpose industrial pipes into unique concrete planters for an edgy and unconventional look. Cut PVC pipes into desired lengths and seal one end. Mix concrete and pour it into the pipes, ensuring it reaches the desired height. Insert a smaller PVC pipe into the center to create a drainage hole. Once set, remove the outer pipe and plant your favorite greenery for an industrial-chic vibe.
DIY Tutorial:
- Cut PVC pipes into desired lengths and seal one end with duct tape.
- Mix concrete according to package instructions.
- Pour concrete into the PVC pipes, filling them to the desired height.
- Insert a smaller PVC pipe into the center to create a drainage hole.
- Tap gently to remove air bubbles.
- Allow the concrete to set for 24-48 hours.
- Carefully remove the outer PVC pipe and sand any rough edges.
- Plant your favorite greenery and showcase your industrial pipe planters with pride.
6. Stepping Stone Planters
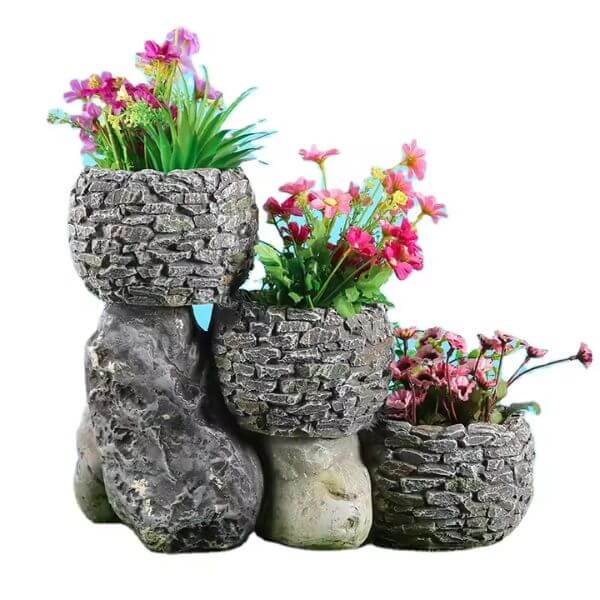
Create multifunctional concrete planters that double as stepping stones in your garden. Use large, shallow molds to pour concrete and press decorative leaves or patterns into the surface. Once set, remove the molds and place the stepping stone planters strategically in your garden. Plant succulents or low-growing herbs in the indentations for a whimsical touch.
DIY Tutorial:
- Prepare large, shallow molds for pouring concrete.
- Mix concrete and pour it into the molds, filling them to the desired depth.
- Press decorative leaves or patterns into the surface of the concrete.
- Tap gently to ensure the leaves or patterns are embedded.
- Allow the concrete to set for 24-48 hours.
- Carefully remove the molds and sand any rough edges.
- Place the stepping stone planters in your garden.
- Plant succulents or low-growing herbs in the indentations for a charming and functional display.
7. Concrete Block Planters
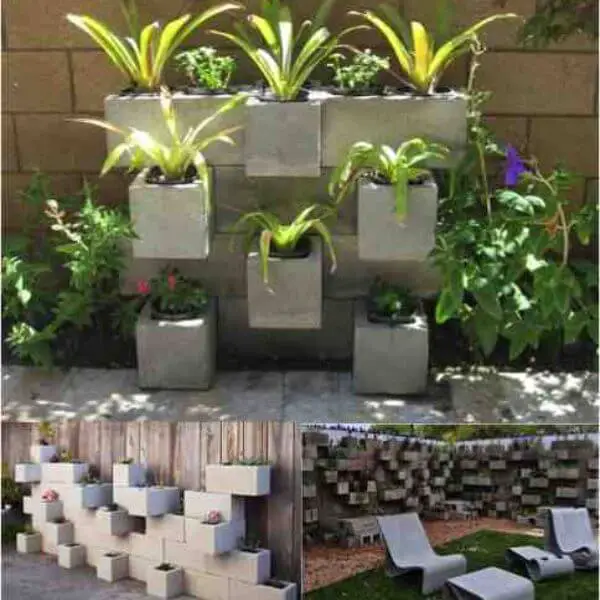
Repurpose concrete blocks into stylish planters for a modern and minimalist look. Stack concrete blocks in various configurations to create unique planter designs. Fill the cavities with soil and plant your favorite greenery. These versatile planters can be arranged vertically or horizontally to suit any space.
DIY Tutorial:
- Arrange concrete blocks in your desired configuration.
- Fill the cavities with potting soil.
- Plant your favorite greenery in each cavity.
- Stack additional blocks on top, if desired, to create height variation.
- Water your plants regularly and enjoy your modern concrete block planters.
8. Concrete Orb Planters
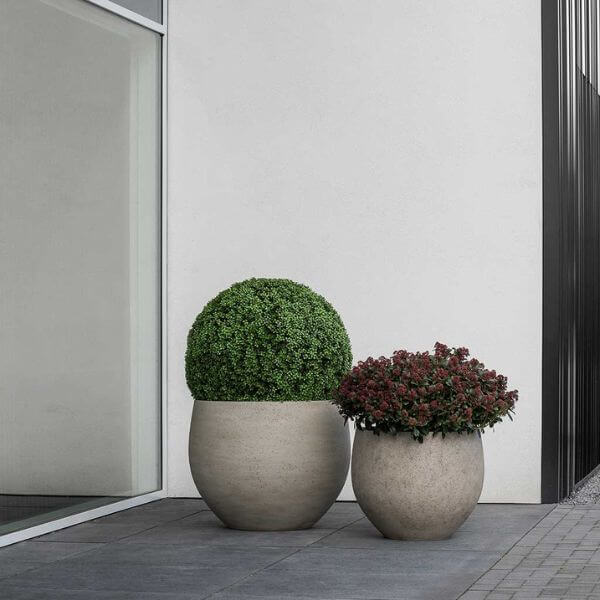
Add a touch of whimsy to your garden with concrete orb planters. Mix concrete and pour it into spherical molds, ensuring they are evenly coated. Let the concrete set partially, then create a hollow center using a smaller mold or scoop. Once fully set, remove the molds and plant your greenery inside the hollow orbs for a charming display.
DIY Tutorial:
- Mix concrete according to package instructions.
- Pour concrete into spherical molds, ensuring they are evenly coated.
- Let the concrete set partially, then create a hollow center using a smaller mold or scoop.
- Allow the concrete to set completely for 24-48 hours.
- Carefully remove the molds and sand any rough edges.
- Plant your favorite greenery inside the hollow orbs and place them in your garden for a whimsical touch.
9. Concrete Leaf Planters
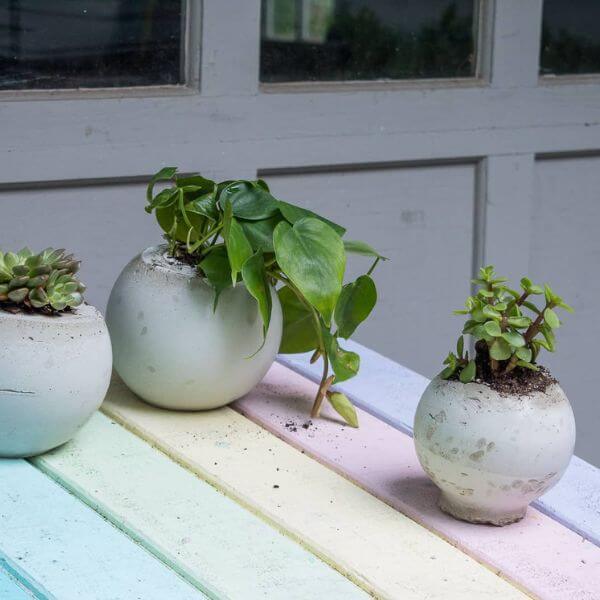
Bring a natural element to your space with concrete leaf planters. Coat large leaves with cooking spray to prevent sticking, then press them into a bed of wet concrete. Once set, remove the leaves to reveal intricate leaf impressions. Plant your favorite greenery in the leaf-shaped planters for a unique and organic display.
DIY Tutorial:
- Choose large, sturdy leaves for your molds.
- Mix concrete according to package instructions.
- Coat the leaves with cooking spray to prevent sticking.
- Press the leaves into a bed of wet concrete, ensuring they are evenly coated.
- Allow the concrete to set for 24-48 hours.
- Carefully remove the leaves to reveal the leaf impressions.
- Plant your favorite greenery in the leaf-shaped planters and enjoy their natural beauty.
10. Concrete Planter Bench
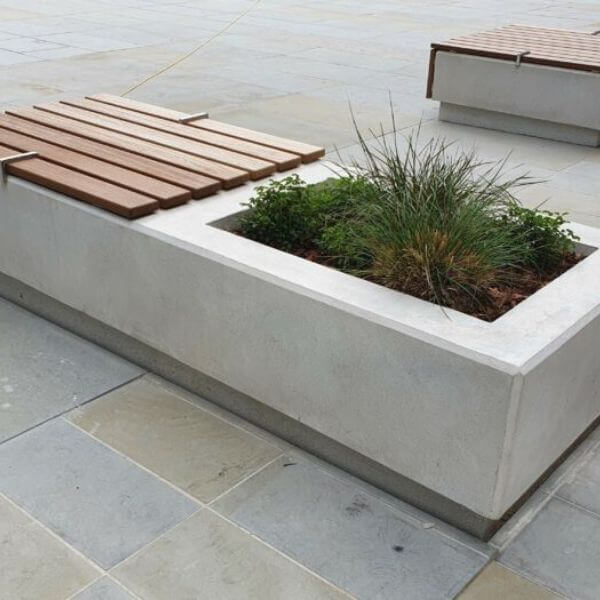
Combine functionality and style with a concrete planter bench. Construct a bench frame using wooden beams and reinforce it with steel rods. Pour concrete into the frame, ensuring it is level and smooth. Once set, remove the frame and add wooden seating on top. Plant your favorite greenery in the built-in concrete planters for a relaxing outdoor oasis.
DIY Tutorial:
- Construct a bench frame using wooden beams, ensuring it is sturdy and level.
- Reinforce the frame with steel rods for added strength.
- Pour concrete into the frame, filling it to the desired height.
- Tap gently to remove air bubbles and smooth the surface.
- Allow the concrete to set for 24-48 hours.
- Carefully remove the frame and sand any rough edges.
- Attach wooden seating on top of the concrete bench.
- Plant your favorite greenery in the built-in concrete planters and enjoy your outdoor oasis.
11. Concrete Succulent Planters
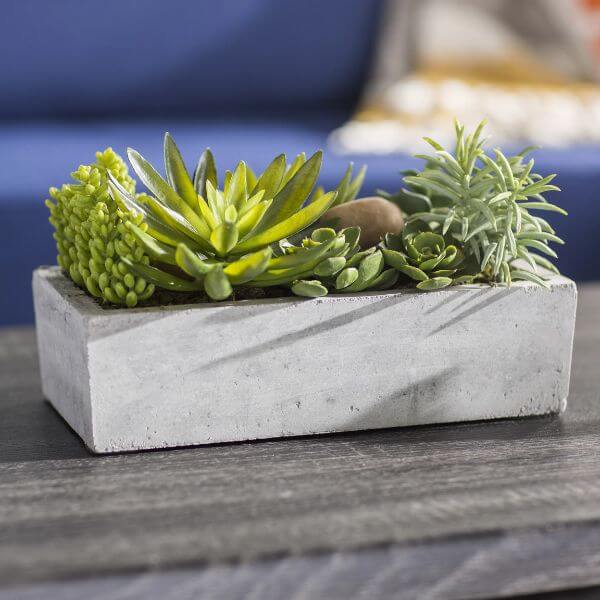
Craft small, individual concrete planters perfect for succulents. Mix concrete and pour it into small silicone molds, such as ice cube trays or candy molds. Press a small indentation into the center of each planter for the succulent. Once set, pop the concrete planters out of the molds and plant your favorite succulents for a charming display.
DIY Tutorial:
- Mix concrete according to package instructions.
- Pour concrete into small silicone molds, filling them halfway.
- Press a small indentation into the center of each planter for the succulent.
- Allow the concrete to set for 24-48 hours.
- Carefully remove the planters from the molds and sand any rough edges.
- Plant your favorite succulents in the indentations and enjoy your miniature concrete succulent planters.
12. Concrete Alphabet Planters
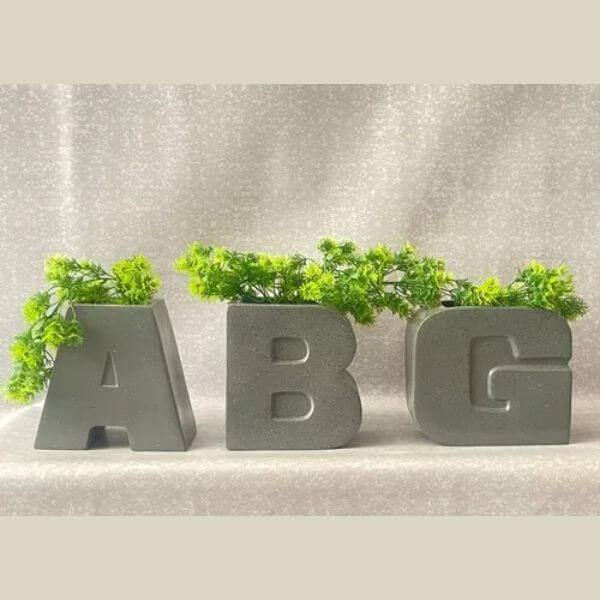
Personalize your space with concrete alphabet planters spelling out your favorite words or initials. Create molds in the shape of letters using cardboard or wood. Mix concrete and pour it into the molds, ensuring it reaches all the corners. Once set, remove the molds and plant your favorite greenery for a customized touch.
DIY Tutorial:
- Create molds in the shape of letters using cardboard or wood.
- Mix concrete according to package instructions.
- Pour concrete into the molds, ensuring it reaches all the corners.
- Tap gently to remove air bubbles.
- Allow the concrete to set for 24-48 hours.
- Carefully remove the molds and sand any rough edges.
- Plant your favorite greenery in each letter-shaped planter to spell out your desired word or initials.
13. Concrete Tealight Candle Holders
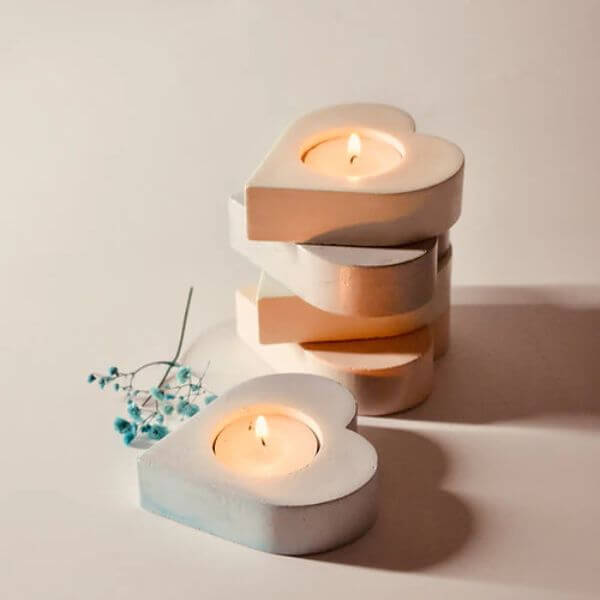
Illuminate your space with concrete tealight candle holders for a cozy ambiance. Mix concrete and pour it into small molds, such as yogurt containers or silicone molds. Insert a tealight candle into the center of each mold, ensuring it is centered. Once set, remove the molds and place tealight candles inside for a warm glow.
DIY Tutorial:
- Mix concrete according to package instructions.
- Pour concrete into small molds, filling them halfway.
- Insert a tealight candle into the center of each mold, ensuring it is centered.
- Allow the concrete to set for 24-48 hours.
- Carefully remove the molds and sand any rough edges.
- Place tealight candles inside the concrete holders and enjoy the cozy ambiance they create.
14. Concrete Wall Planters
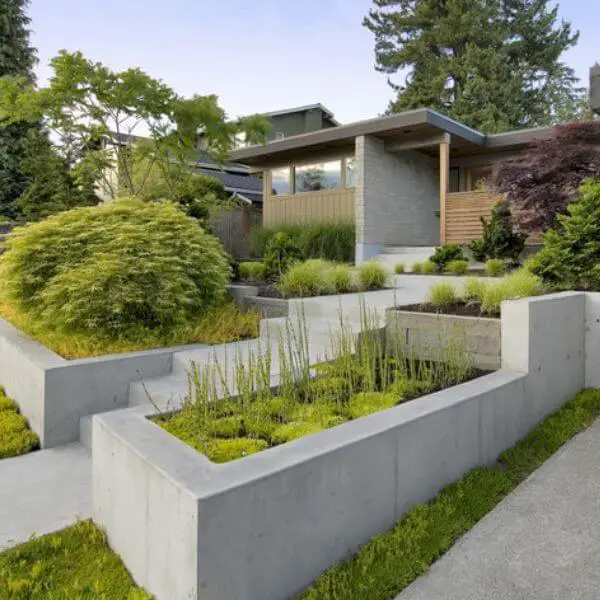
Maximize vertical space with concrete wall planters for a striking display of greenery. Create molds in various shapes and sizes using cardboard or wood. Mix concrete and pour it into the molds, ensuring it is evenly distributed. Once set, remove the molds and mount the concrete planters on your wall. Plant your favorite greenery for a living work of art.
DIY Tutorial:
- Create molds in various shapes and sizes using cardboard or wood.
- Mix concrete according to package instructions.
- Pour concrete into the molds, ensuring it is evenly distributed.
- Tap gently to remove air bubbles.
- Allow the concrete to set for 24-48 hours.
- Carefully remove the molds and sand any rough edges.
- Mount the concrete planters on your wall using appropriate hardware.
- Plant your favorite greenery in each planter and enjoy your living work of art.
15. Concrete Bird Bath Planter
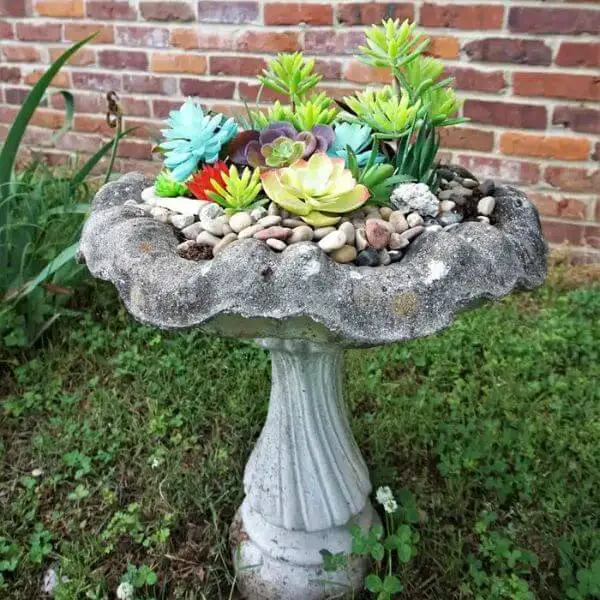
Create a focal point in your garden with a concrete bird bath planter. Construct a mold using a large bowl and smaller containers for the planter section. Mix concrete and pour it into the mold, ensuring it fills all the crevices. Once set, remove the mold and place the bird bath planter in your garden. Fill the planter section with soil and plant your favorite flowers to attract feathered friends.
DIY Tutorial:
- Construct a mold using a large bowl and smaller containers for the planter section.
- Mix concrete according to package instructions.
- Pour concrete into the mold, ensuring it fills all the crevices.
- Tap gently to remove air bubbles.
- Allow the concrete to set for 24-48 hours.
- Carefully remove the mold and sand any rough edges.
- Place the bird bath planter in your garden.
- Fill the planter section with soil and plant your favorite flowers to attract birds and butterflies.
16. Concrete Herb Garden
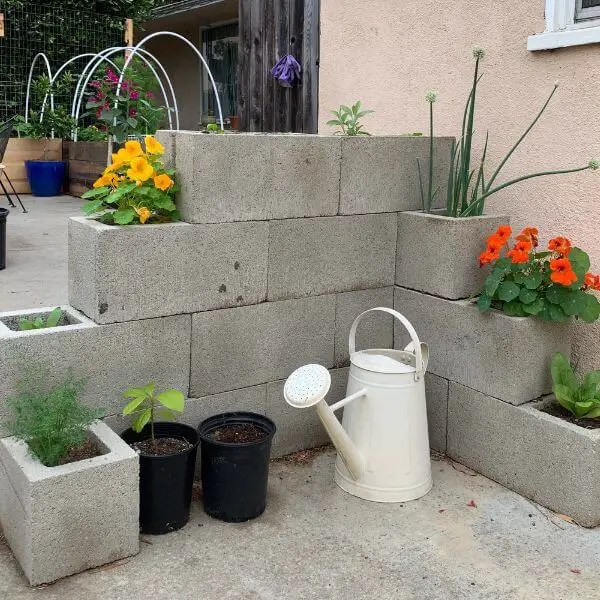
Create a functional and stylish herb garden with concrete planters. Craft individual planters for each herb using silicone molds or small containers. Mix concrete and pour it into the molds, ensuring it fills them completely. Once set, remove the planters from the molds and arrange them in a sunny spot. Plant your favorite herbs for fresh flavors right at your fingertips.
DIY Tutorial:
- Choose silicone molds or small containers for your herb planters.
- Mix concrete according to package instructions.
- Pour concrete into the molds, filling them completely.
- Tap gently to remove air bubbles.
- Allow the concrete to set for 24-48 hours.
- Carefully remove the planters from the molds and sand any rough edges.
- Arrange the concrete herb planters in a sunny spot.
- Plant your favorite herbs and enjoy fresh flavors right at your fingertips.
17. Concrete Mushroom Planter
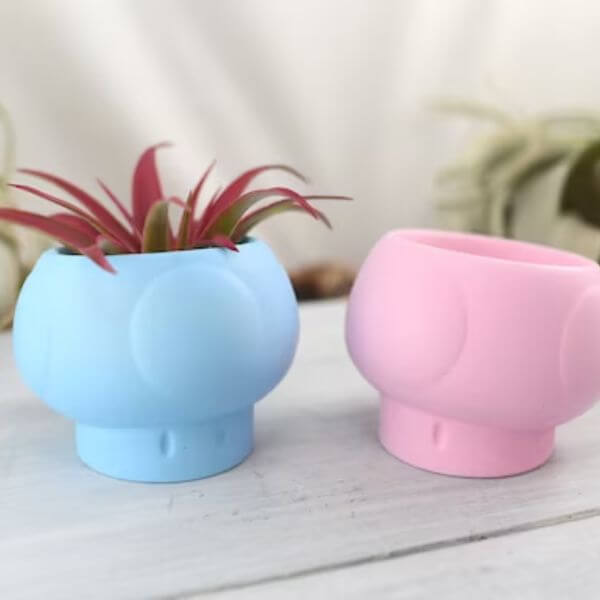
Add a whimsical touch to your garden with concrete mushroom planters. Create molds for the mushroom caps and stems using bowls and PVC pipes. Mix concrete and pour it into the molds, ensuring it fills them completely. Once set, remove the molds and assemble the mushroom planters. Plant your favorite flowers or succulents for a magical garden display.
DIY Tutorial:
- Create molds for the mushroom caps and stems using bowls and PVC pipes.
- Mix concrete according to package instructions.
- Pour concrete into the molds, filling them completely.
- Tap gently to remove air bubbles.
- Allow the concrete to set for 24-48 hours.
- Carefully remove the molds and sand any rough edges.
- Assemble the mushroom planters by attaching the caps to the stems.
- Plant your favorite flowers or succulents in the mushroom planters and enjoy their magical charm.
18. Concrete Lantern Planters
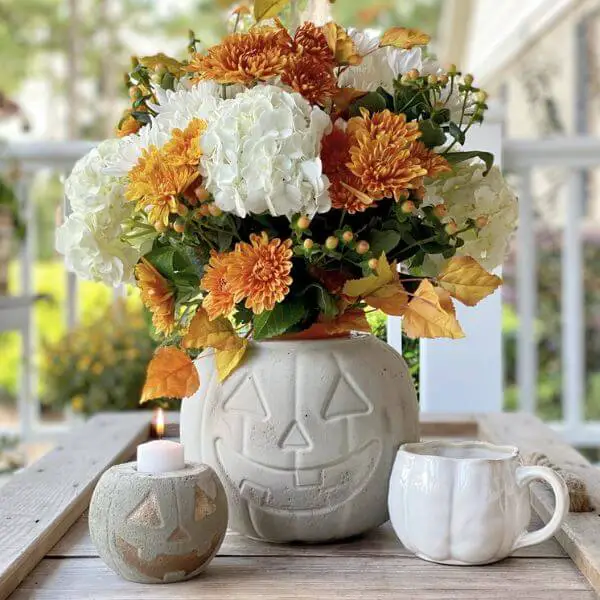
Illuminate your outdoor space with concrete lantern planters for a warm and inviting atmosphere. Craft lantern molds using cardboard or wood and line them with plastic wrap. Mix concrete and pour it into the molds, ensuring it fills them completely. Once set, remove the molds and place LED candles inside for a safe and cozy glow.
DIY Tutorial:
- Create lantern molds using cardboard or wood and line them with plastic wrap.
- Mix concrete according to package instructions.
- Pour concrete into the molds, filling them completely.
- Tap gently to remove air bubbles.
- Allow the concrete to set for 24-48 hours.
- Carefully remove the molds and sand any rough edges.
- Place LED candles inside the concrete lanterns and enjoy the warm and inviting glow they create in your outdoor space.
19. Concrete Shell Planters
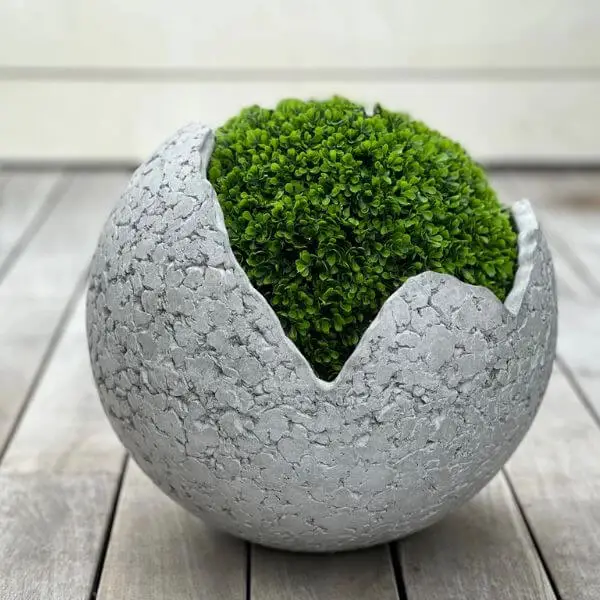
Bring a coastal vibe to your space with concrete shell planters. Collect large seashells or use silicone molds to create shell-shaped molds. Mix concrete and pour it into the molds, ensuring it fills them completely. Once set, remove the molds and plant your favorite succulents or air plants for a beachy touch.
DIY Tutorial:
- Collect large seashells or use silicone molds to create shell-shaped molds.
- Mix concrete according to package instructions.
- Pour concrete into the molds, filling them completely.
- Tap gently to remove air bubbles.
- Allow the concrete to set for 24-48 hours.
- Carefully remove the molds and sand any rough edges.
- Plant your favorite succulents or air plants in the concrete shell planters and enjoy their beachy charm.
20. Concrete Basket Planters
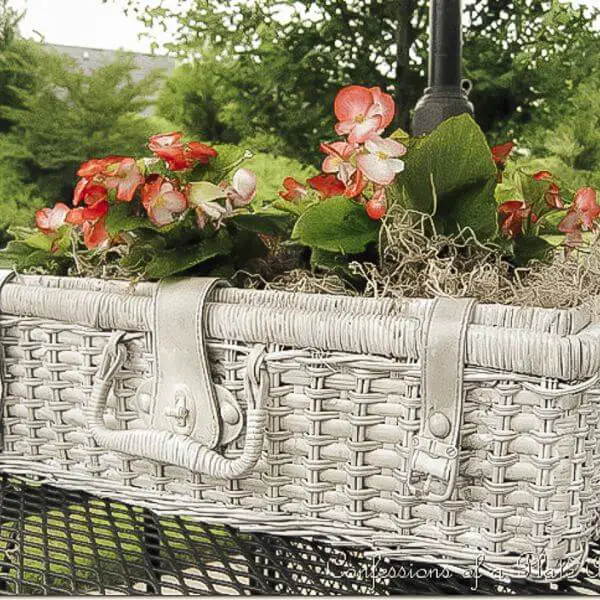
Add a touch of rustic charm to your space with concrete basket planters. Craft molds using woven baskets or create a lattice pattern with strips of cardboard. Mix concrete and pour it into the molds, ensuring it fills them completely. Once set, remove the molds and plant your favorite flowers or herbs for a country-inspired display.
DIY Tutorial:
- Craft molds using woven baskets or create a lattice pattern with strips of cardboard.
- Mix concrete according to package instructions.
- Pour concrete into the molds, filling them completely.
- Tap gently to remove air bubbles.
- Allow the concrete to set for 24-48 hours.
- Carefully remove the molds and sand any rough edges.
- Plant your favorite flowers or herbs in the concrete basket planters and enjoy their rustic charm.
21. Concrete Trough Planters
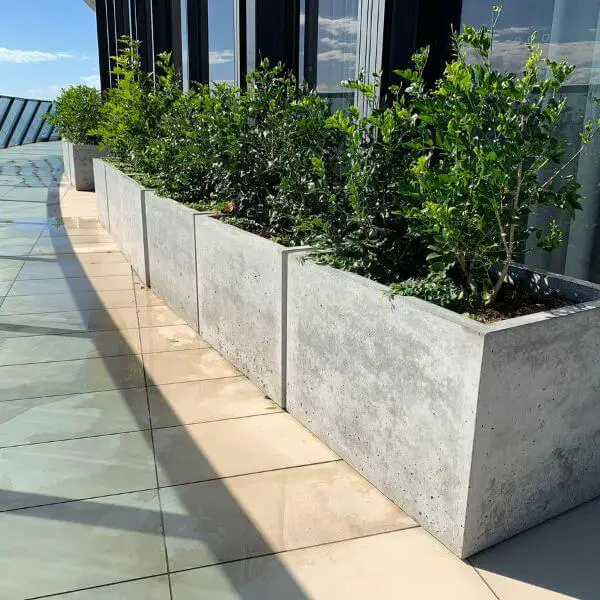
Create sleek and modern concrete trough planters for a minimalist look. Craft molds using wood or plastic and ensure they are watertight. Mix concrete and pour it into the molds, smoothing the surface with a trowel. Once set, remove the molds and plant your favorite grasses or trailing plants for a contemporary garden display.
DIY Tutorial:
- Craft molds using wood or plastic and ensure they are watertight.
- Mix concrete according to package instructions.
- Pour concrete into the molds, filling them completely.
- Smooth the surface with a trowel.
- Allow the concrete to set for 24-48 hours.
- Carefully remove the molds and sand any rough edges.
- Plant your favorite grasses or trailing plants in the concrete trough planters and enjoy their sleek and modern aesthetic.
22. Concrete Bicycle Planter
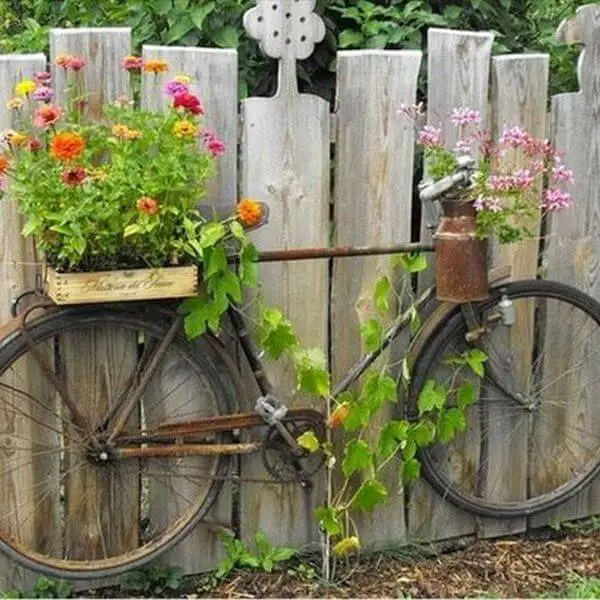
Add a whimsical touch to your garden with a concrete bicycle planter. Create a mold for the bicycle frame using wood or plastic and line it with plastic wrap. Mix concrete and pour it into the mold, ensuring it fills all the crevices. Once set, remove the mold and attach bicycle wheels and handlebars. Plant your favorite flowers or trailing plants for a charming garden display.
DIY Tutorial:
- Create a mold for the bicycle frame using wood or plastic and line it with plastic wrap.
- Mix concrete according to package instructions.
- Pour concrete into the mold, filling it completely.
- Tap gently to remove air bubbles.
- Allow the concrete to set for 24-48 hours.
- Carefully remove the mold and sand any rough edges.
- Attach bicycle wheels and handlebars to the concrete frame.
- Plant your favorite flowers or trailing plants in the bicycle planter and enjoy its whimsical charm.
23. Concrete Swirl Planter
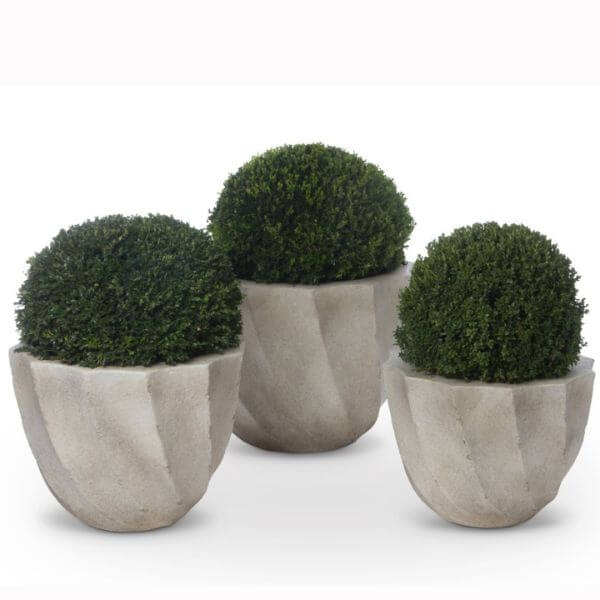
Create a stunning concrete swirl planter for a mesmerizing garden display. Mix concrete and pour it into a round mold, smoothing the surface with a trowel. Use a stick or skewer to create swirl patterns in the wet concrete. Once set, remove the mold and plant your favorite flowers or succulents for a unique focal point.
DIY Tutorial:
- Mix concrete according to package instructions.
- Pour concrete into a round mold, filling it completely.
- Smooth the surface with a trowel.
- Use a stick or skewer to create swirl patterns in the wet concrete.
- Allow the concrete to set for 24-48 hours.
- Carefully remove the mold and sand any rough edges.
- Plant your favorite flowers or succulents in the concrete swirl planter and enjoy its mesmerizing beauty.
24. Concrete Pineapple Planter
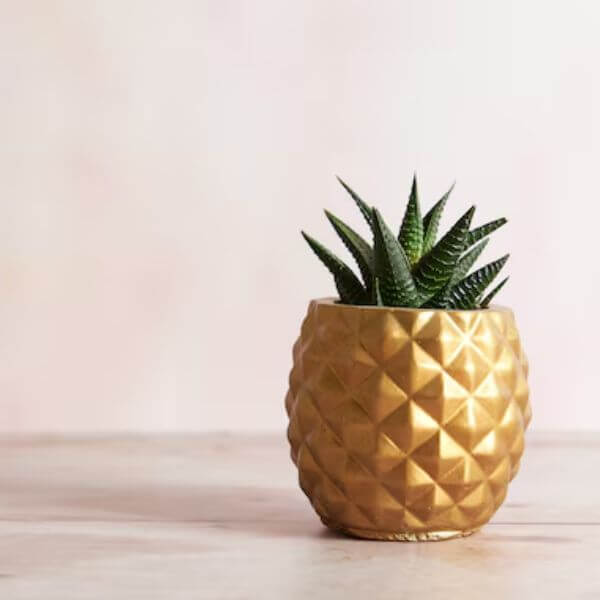
Add a tropical touch to your space with a concrete pineapple planter. Create a mold for the pineapple shape using wood or plastic and line it with plastic wrap. Mix concrete and pour it into the mold, ensuring it fills all the crevices. Once set, remove the mold and paint the pineapple with yellow or gold paint. Plant your favorite succulents or air plants for a playful garden display.
DIY Tutorial:
- Create a mold for the pineapple shape using wood or plastic and line it with plastic wrap.
- Mix concrete according to package instructions.
- Pour concrete into the mold, filling it completely.
- Tap gently to remove air bubbles.
- Allow the concrete to set for 24-48 hours.
- Carefully remove the mold and sand any rough edges.
- Paint the concrete pineapple with yellow or gold paint.
- Plant your favorite succulents or air plants in the pineapple planter and enjoy its playful charm.
25. Concrete Gazing Ball Planter
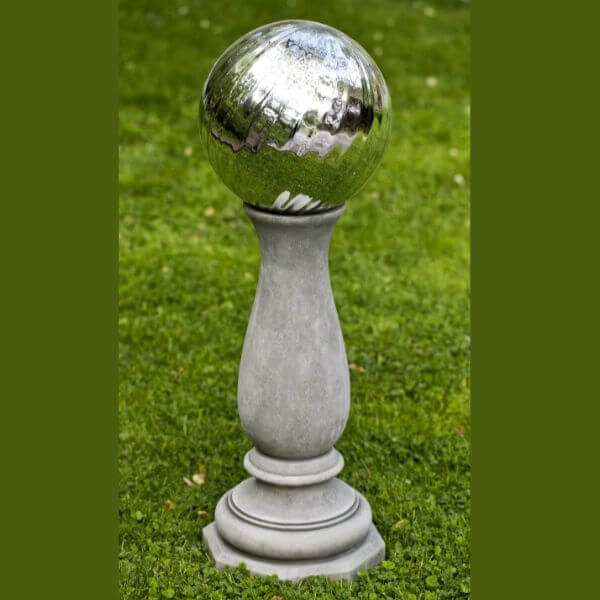
Create a mesmerizing concrete gazing ball planter for a whimsical garden display. Craft a mold for the gazing ball using a large bowl or exercise ball and line it with plastic wrap. Mix concrete and pour it into the mold, ensuring it fills all the crevices. Once set, remove the mold and plant your favorite flowers or trailing plants around the gazing ball for a magical effect.
DIY Tutorial:
- Craft a mold for the gazing ball using a large bowl or exercise ball and line it with plastic wrap.
- Mix concrete according to package instructions.
- Pour concrete into the mold, filling it completely.
- Tap gently to remove air bubbles.
- Allow the concrete to set for 24-48 hours.
- Carefully remove the mold and sand any rough edges.
- Plant your favorite flowers or trailing plants around the concrete gazing ball and enjoy its magical effect in your garden.
John Henry is a passionate co-creator of FlooringFlow.com. a website dedicated to answer all of your flooring related questions. After taking the challenges of flooring DIYs while learning skills for years, John is now ready to share his knowledge related to floor remodeling and projects with you.

