
Installing hardwood floors on concrete floors is a tricky task which leaves many homeowners out of ideas.
While the usual methods of attaching hardwood floors to concrete surfaces are using nails, screws, and other such fasteners, homeowners find gluing very intimidating for this job.
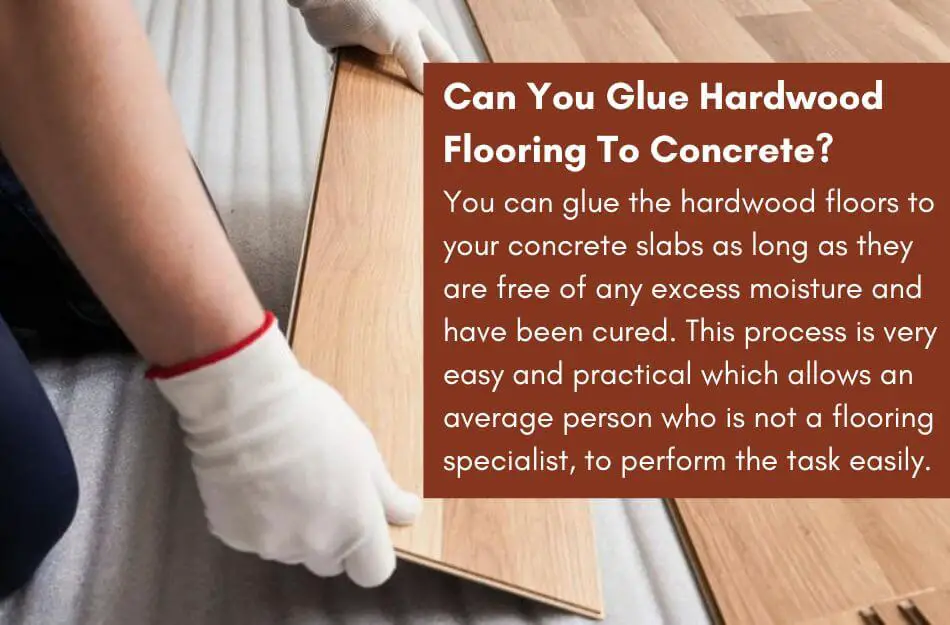
But the question is, can you glue hardwood flooring to concrete?
You can glue the hardwood floors to your concrete slabs as long as they are free of any excess moisture and have been cured. This process is very easy and practical which allows an average person who is not a flooring specialist, to perform the task easily.
However, there are some pointers that you must keep in mind before attempting to install wooden floors on any concrete surface.
Read along to find out all the necessary information related to the topic.
Table of Contents
- 1 Step-By-Step Guide To Glueing Hardwood Flooring To Concrete
- 2 Things to Consider Before Installing Hardwood Over Concrete
- 3 Can You Glue Hardwood Flooring To Concrete?
- 4 How Do You Glue Hardwood Floors Over Concrete?
- 5 How To Attach A Wood Floor To A Concrete Floor?
- 6 What Is The Easiest Way To Attach Wood To Concrete?
- 7 How Do You Attach Wood To Existing Concrete?
- 8 Do I Need A Moisture Barrier Between Concrete And Wood?
- 9 Takeaway
Step-By-Step Guide To Glueing Hardwood Flooring To Concrete
If you have the right direction regarding gluing hardwood floors to your concrete bases but don’t know where to start, we’ve got you covered.
Here is a step-by-step procedure for gluing your hardwood planks to concrete.
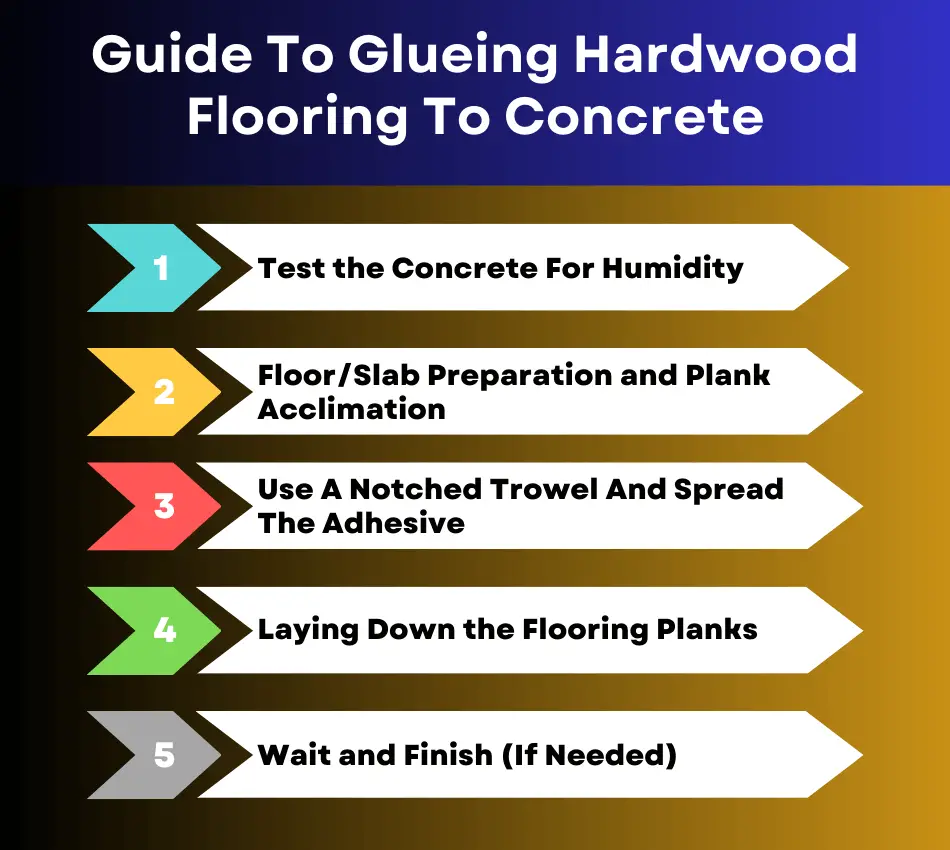
Test the Concrete For Humidity
Concrete is usually thought to be resistant to moisture and water. Many people believe that water does not have much effect on concrete.
While this is true for most cases, we can’t rule out that concrete has pores and might retain some moisture.
It is highly possible that the moisture absorbed by concrete can seep into your hardwood floors when glued and cause serious disturbances.
Hence, it is best to test the concrete for the moisture content it holds so it does not cause any trouble later on.
Ensure that the moisture content in your concrete is as low as possible, as too much of it can cause serious problems when your flooring is installed.
A reasonable way to know if the moisture content is right is to match it with your adhesive instructions.
It will tell you the recommended amount of moisture, so you will know whether it is the right time to start gluing your wooden floors on the concrete surface or not.
If the moisture content is high and you don’t want to wait too much for it to settle down, you can always use a moisture mitigation system to make the moisture content of your concrete slab the same as the one mentioned on your adhesive.
Make sure only to proceed when the moisture level is right if you want to save yourself many troubles in the future.
For instance, if you are buying engineered hardwood, the manufacturer might only validate the warrant of your floors if the moisture content is right.
Besides, if you install the floors against your manufacturer’s warranty, you might lose your warranty once and for all.
Every concrete slab will contain moisture; you can’t expect it to dry up with 0% moisture completely.
Because if that happens, the concrete will start to crumble; hence you need moisture to a certain extent.
Your goal must be to keep the moisture content of your slap as lose as the rating given by your flooring manufacturer or adhesive.
If the moisture content remains high despite your efforts, try countering factors such as rain, the extra moisture in the soil, spillages, etc.
Once you get these in control, you will surely get an optimum moisture rating for your concrete slabs.
Floor/Slab Preparation
Now that the concrete has been tested and proven that it is ready to receive the flooring, you must proceed towards preparing the floor and the planks for installation.
Before you can glue the hardwood sheets on your concrete slab, make sure that it is level.
Unevenness on the slab’s surface will inherently lead to uneven floors and might put extra pressure on some planks, causing cracking, reshaping, or even breaks at some point.
Many steps involve leveling the slab for your gluing purposes, such as scraping, leveling, sanding, and filling low spots.
Your slab might require all or a few of these, depending on the extent of unevenness in the surface.
It is important to note that when you attempt to “level” (actually flattening) a slab, make sure that you are not allowing more than a 3/16” height difference within a 10-foot radius or 1/8” within a 6-foot radius.
Another method you can adopt for leveling is to use a cementitious patch or get underlying that would sit on the slab and fill the voids before placing the planks on it.
Although this method is not advised and is usually frowned upon, you can utilize it in scenarios where you don’t know the leveling procedure yourself, and professional services are also unavailable.
Moreover, cleaning and disinfecting the surface is compulsory to ensure no unwanted substances, bacteria, or infections in the concrete’s surface that might damage the hardwood later on.
Besides, it would be best to remember that once cleaned and disinfected; the concrete slab must be left overnight to allow it to dry completely.
Hardwood floors are costly compared to other types of flooring options, but many homeowners still choose them because they are looking for a luxury look in their house with a low-maintenance and durable solution.
You can expect the hardwood floors to last 2-3 decades; if the wood is engineered or treated, the time might increase by another 10 years.
Moreover, they only require finishing or staining by the time they are installed, after which menial care and maintenance are required.
However, this can only be possible when they are given a sturdy base with all the necessary features to complement the hardwood floors.
Below are some of the factors that must be present in the concrete slab before you can attempt installing your wooden sheets:
- Dryness: The concrete slab must be dry to a certain extent where it meets the moisture content ratings demanded by the flooring manufacturer or the adhesive you are using.
- Leveled surface: hardwood floors can’t be installed on an uneven surface; hence the slab must be leveled before you can place the planks on it.
Plank Acclimation
Apart from these factors, allowing the wood to acclimate before you install it on the slab would be best.
Acclimation refers to the process where the wood adjusts to the surrounding environment and makes adjustments accordingly.
A suitable example would be a wooden board that was stored in a dry environment and moved to a more moist condition where it needs to be installed.
During the acclimation process, the wood will soak up moisture from the surroundings to the point where the moisture level of the wood is the same as air; hence, the wood has expanded.
The wood will adjust after installation if you don’t allow for acclimation beforehand.
This can be seriously troublesome as your arrangement and placement of the planks can be ruined once all the boards start to expand or contract.
Even if you had left room for expansions, acclimation would cause the wood to either shrink too much and create visible gaps between the boards or expand too much that it starts to buckle.
Despite the installation method, you still need to allow the wood some time to acclimate. It doesn’t matter if you will glue, nail, or screw it; you must give the wood some time.
If you are worried about how to allow this acclimation, you can consult the user manual or any instructions or guidelines provided by the manufacturer.
The time required for acclimation can vary depending on the type of wood you’ve chosen and the manufacturer that made it.
For instance, two same types of wood planks created in a moist and a dry environment will need different amounts of time when they reach a certain environment.
If you can’t get any details from the manufacturer and are worried about how long you should leave the wood to acclimate, using an accurate wood moisture meter is better.
This tool allows the moisture content of the wood to be measured, letting you know if the wood has acclimated or not.
The purpose of the wood is to reach an equilibrium moisture content (EMC) with the surrounding environment.
You can use hit and trial method for this purpose, where you will keep on measuring the moisture content periodically before
You can get two types of moisture meters to check if your wood has achieved the EMC or not; pin meters and pinless meters. The latter is chosen more often for its non-destructive electromagnetic measurement capability.
Use A Notched Trowel And Spread The Adhesive
A notched trowel is the best way to apply the adhesive on your concrete slabs, as it allows for even application and doesn’t get stuck with the adhesive itself.
It is recommended to start your project along a long wall or the farthest end of the room; this way, you won’t be stepping over the boards when you come out of the area.
Moreover, construction adhesives dry up very fast, so make sure you catch up with the pace so that no adhesive is wasted.
An important tip is to apply the glue on a small portion and work on singular boards rather than coating a large area with glue and then rushing over to paste the wooden sheet on top in a hassle.
It is always recommended to get a know-how of the adhesive’s drying time so you are aware of the time window you need to work in.
The glue should be applied on the plank’s tongue and groove sides for optimum support and better grip.
It is hard to mess it up when you are working with singular boards and not the entire area simultaneously.
In addition, you must also check if the adhesive supports the type of wood you are using. The wrong type of adhesive can cause many disturbances in the future.
If the adhesive does not support the type of wood you are using, it can lose its grip over time, causing the boards to either become squeaky or lift up from the surface.
Besides, the right type of adhesive would come from mainly natural substances and would feature an incredible amount of elasticity.
This is necessary to allow the wood to expand and contract freely without being constricted in a tough spot.
A non-recommended glue, however, would not offer any elasticity, and as time passes and the wood runs a cycle of expansions and contractions, the glue will slowly start to lose grip and make the boards loose and shaky.
In worst cases, the glue would not hold the boards for even a second as it does not support the material; this would result in an added task as all your preparations might go to waste.
In fact, you might even have to remove the glue from both the wooden planks and the concrete slab, which can be a difficult task to perform.
For instance, using a wood floor adhesive with 0 water content is a very beneficial solution for this purpose.
They prove to be the best bonding agents and allow optimum flexibility and elasticity to your wooden boards without compromising on strength and stability.
Laying Down the Flooring Planks
Although it might sound pretty simple to place the planks on the adhesive, it is not as simple as it might sound.
Once a portion of the floor has been covered with adhesive and applied the required amount on the plank, you must place it on the portion.
However, it is noteworthy that you must measure the room’s dimensions first and then divide that figure by the dimensions of the plank to figure out how many planks you would require.
Then, if you want to take it more to the professional level, you can add room for spacings (to allow expansions in seasonal changes) and leave a minimal gap between the planks.
The amount of gap required between the planks depends on the wood you are using, as various types of wood expand and contract with different ratios.
In addition, whether you have allowed acclimation earlier is a major factor in deciding how much gap must be left.
Once the area has been glued, and the planks have been placed, fix them using the tongue and groove joints prepared earlier.
Make sure that the planks are joined perfectly and that there are no bumps or unevenness in between
Apply Pressure to the Flooring
Air pockets forming in your adhesive layer are the worst nightmare of a homeowner who has recently installed a hardwood floor.
This can result in the boards coming off and not getting the proper level of support from the base resulting in many types of damage.
To avoid this from happening, you must apply pressure on the planks once they have been installed.
While different manufacturers recommend different techniques, two have been provided as the most efficient and easy.
The first one is to use a 100-pound roller on your hardwood floors shortly after installation.
This will press them more toward the concrete slab and eliminate any air gaps that might have formed, allowing for better adhesion.
The second way is to put weights on three points of each plank (a top, bottom, and middle) and let them stay overnight for the best results.
Although this is a bit messy, and the task can become a hassle if the flooring area is too big, the major benefit is that it allows for optimum support.
Moreover, you can use anything with a wide base and a decent weight. Each item should have a weight ranging between 1 to 2 kg, and you can find everyday home items for this purpose.
Wait and Finish (If Needed)
Allowing the adhesive to dry and grip the floors properly is crucial before you can do anything else with it.
You must give at least 24 hours for the glue to dry before moving in furniture or attempting anything else.
However, this time might vary according to the climatic conditions of your area, the type of wood, and the recommended drying time of the adhesive, so make sure to keep these factors in mind beforehand.
Once you finish the gluing process, you can move forward to finishing or sealing your floors if required or move in furniture and other items if you want to.
Things to Consider Before Installing Hardwood Over Concrete
It is important to consider a few factors before you attempt to glue your hardwood floors to the concrete slab.
Hardwood floors are an investment, and you wouldn’t want your investment to go to waste; hence, it is necessary to look at everything relevant and might affect the performance or longevity of your hardwood floors.
Improper installation or installing in unsuitable conditions can result in disasters and may cause your money to be lost and your floorings to be ruined.
Hence, you must figure out the right type of wood for your environment and make sure that the concrete slab is in the best condition before it can be used as a base for your hardwood floors.
You can take this project to yourself and use the guide mentioned above and your prior knowledge/experience (if you have any), or you can get professional services to complete this job. As this is a complex task, the latter is mostly preferred.
Here are a few factors that you must look for before starting any hardwood gluing project:
Grade Level
The grade level is the position of the concrete slab on the ground. If your slab is sitting directly on the ground, it would be known as (on grade), which means on the ground. However, it would be called above grade if it sits above the ground.
Lastly, if your slab is placed below the ground level (it can be dug into the ground), it would be known as below grade.
Determining the right grade level or planning according to the existing grade level is important if you want to get the best results for your hardwood flooring.
Age of Concrete Floor
You can’t plan hardwood flooring on concrete slabs which have been freshly constructed.
As concrete takes time to cure, you would need to wait until the cure has been completed; otherwise, you will be ruining both the wooden floors and the concrete slab.
Hence, you can’t think about getting hardwood flooring in a house that has been recently constructed.
The usual time for the cure is 6 to 8 weeks; however, it can differ according to the size of the slab and the environment.
Besides, this process must remove any extra moisture in your concrete slabs, so they won’t damage your hardwood floors once installed.
Moisture Level
Even if the slab is cured, there can still be a high level of moisture present inside due to various factors.
The greatest reason for wet slabs is the extra level of moisture coming from the ground and seeping into the concrete slab.
Moreover, if the overall environment is humid or you have many humidifiers that keep your home damp, you can experience wet slabs.
Blockages in foundation drains can also be a reason for this problem.
However, these problems must be addressed before the hardwood floors can be installed; otherwise, installing them won’t benefit them, and the moisture will only ruin the wood.
Can You Glue Hardwood Flooring To Concrete?
Gluing hardwood floors to concrete is possible if the concrete does not have extra moisture and you are using a suitable adhesive.
It is highly crucial to note that hardwood flooring should never be glued to a concrete slab that has been freshly constructed.
You must wait for at least 1 to 2 months before the concrete slab has been cured.
Only then can the hardwood flooring be glued to the concrete surface.
Moreover, make sure that there is no extra dampness around the area where you will install the hardwood floors on the concrete slab as it can cause much damage to both concrete and the wooden floors.
How Do You Glue Hardwood Floors Over Concrete?
Gluing hardwood floors to concrete is a fairly simple task as all you need to do is apply the adhesive on the concrete slab and the wooden plank.
It is recommended to use a trowel for this purpose as it allows for even distribution of the adhesive and makes the task less messy.
Furthermore, you should work on segmented areas and attempt to glue one plank at a time rather than hoarding all the planks on the area which will result in inefficiency and make the situation too messy.
It is best to apply the glue to one plank at a time and the proportionate area of the concrete.
After which you need to place the board on the floor and press it down. Repeat the same procedure for the rest of the boards and join them using the previously prepared tongue and groove joints.
This will help in keeping the planks in place and prevent them from moving around.
Once you are done with all this, apply some pressure on the boards for some time so that the adhesive can work its magic and eliminate any air gaps in between.
This concludes the gluing process for hardwood floors.
How To Attach A Wood Floor To A Concrete Floor?
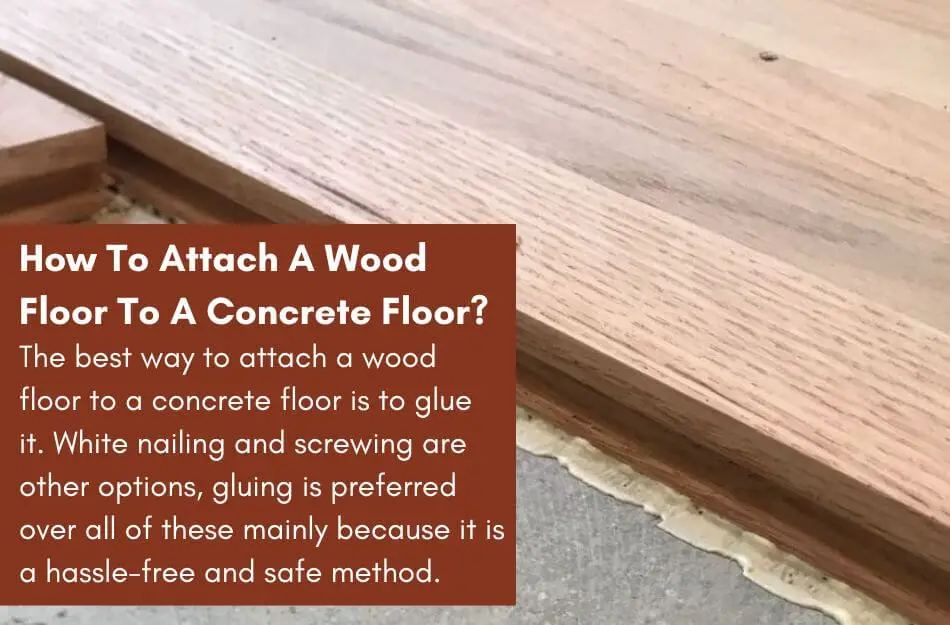
The best way to attach a wood floor to a concrete floor is to glue it.
White nailing and screwing are other options, gluing is preferred over all of these mainly because it is a hassle-free and safe method.
It does not involve the complex marking and drillings that are required when nailing or screwing the boards.
Moreover, there are not many risks involved to your health or the boards when it comes to gluing.
Nailing or screwing can, however, cause splinters, slivers, or even cracks in the boards if not installed properly.
Moreover, these methods do not allow for expansion or contraction of the boards which can result in the boards starting to lift or come off after a few years.
Loosened subfloors and boards are a common issue faced by many homeowners due to this reason.
Gluing can however solve this problem as it allows optimum elasticity and flexibility to hardwood floors so they can expand and contract whenever it is required.
What Is The Easiest Way To Attach Wood To Concrete?
Gluing the hardwood floors to the concrete surface is the most suitable way to attach them.
Nailing and screwing require some skill and knowledge of carpentry which is not possible for every homeowner.
Resultantly, you would have to hire a professional who would charge you at least a few hundred dollars for the installation of the project.
If you attempt the installation process yourself, you might risk the condition of your hardwood floors and one wrongly placed plank can destroy the arrangement of your entire lab.
Besides, there are many possibilities where you can damage the floors during installation through nails and screws.
Hence, it is best to save yourself a lot of time and effort and attempt all installations through gluing which is a simple and easy task that can be performed by almost anyone.
How Do You Attach Wood To Existing Concrete?
Attaching wood to an existing concrete slab is possible by using a powder-actuated gun. This is perhaps the fastest way to attach the hardwood floors to a concrete slab that has been cured for some time.
Using a .22 caliber gun and a gun nail can be the optimum ways of performing this task.
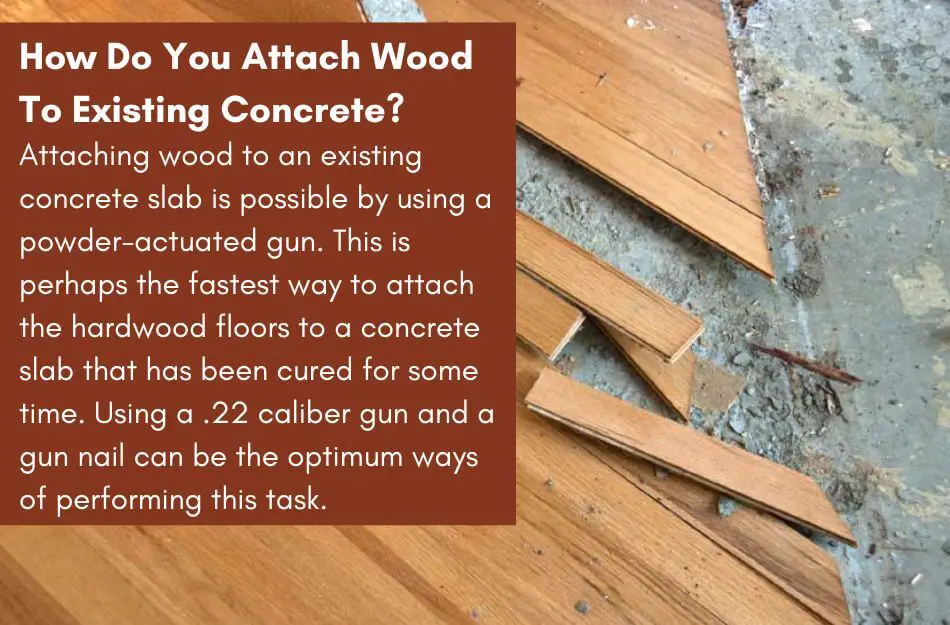
All you need to do is place the board in the right place and pull the trigger on where you want the nail to be driven.
Once you do that, the fastener will be driven directly into the concrete surface and will attach your wooden floors to the slab.
However, it is crucial to ensure that you are wearing safety equipment such as eyeglasses, protective gloves, and a mask to avoid any unnecessary exposure or risk any injury.
Besides, it is always preferred to have another person helping you with this job as holding the plank in place while driving in the fastener can be a bit troublesome to be handled alone.
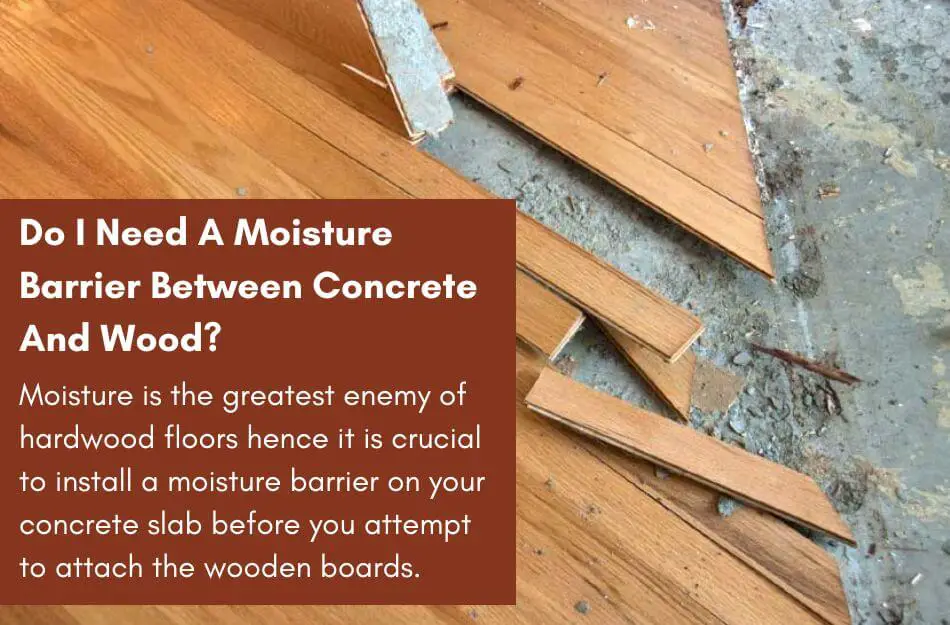
Do I Need A Moisture Barrier Between Concrete And Wood?
Moisture is the greatest enemy of hardwood floors hence it is crucial to install a moisture barrier on your concrete slab before you attempt to attach the wooden boards.
There are many solutions for the moisture problem but an epoxy coating might be the best of them all for your flooring purposes.
As the concrete slab sits directly on the ground and is in constant contact with the soil, it will keep absorbing moisture time-to-time from the ground.
Surely, this moisture will be transferred to your hardwood floors which might cause the floors to buckle, warp, crown, or chip.
All of these are mostly irreversible damages resulting in permanent deformation of your hardwood floors.
Hence, it is best to get a moisture barrier before installing a hardwood floor to avoid any inconveniences in the future.
Takeaway
Gluing has proved to be the best method to fasten your hardwood floors on concrete surfaces.
The major reason behind installing wooden floors on concrete slabs is to provide them with optimum support and protect them from direct moisture exposure from the soil.
Not only does this save you a lot of time and effort but also rules out the necessity of having a subflooring platform as you can now attach the planks to hardwood floors directly
However, it is still necessary to add a moisture barrier between your hardwood planks and the concrete surface to make sure that the moisture from the soil does not reach the hardwood boards through the concrete surface.
Once you have performed this action, gluing your boards to the concrete won’t be an issue and will surely prove to be a fruitful decision for you in the future.

As a co-creator of FlooringFlow.com, Emma Sophia comes on board to answer all your questions related to any flooring problems. Together with John Henry, she’s gained extensive experience in fixing many flooring problems in their own house as well as in friends and family’s. Now, she wants to share her knowledge that she gained during floor remodeling, restoring, and DIY projects.


