
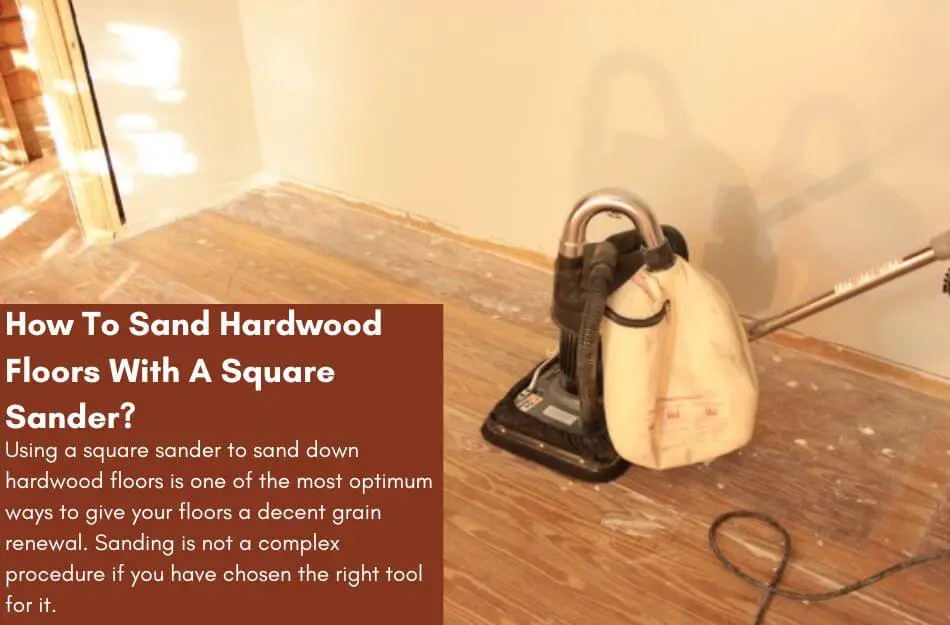
Using a square sander to sand down hardwood floors is one of the most optimum ways to give your floors a decent grain renewal.
Sanding is not a complex procedure if you have chosen the right tool for it.
However, if you are new to the field and do not know much about this process, you will be guided about each and everything in this article.
To sand hardwood floors with a square sander, clear the area and select the appropriate grit. Start sanding with the chosen square sander, ensuring proper grit and sufficient laps for optimal results in restoring the floors’ appearance.
To get to know all these details, you will have to read the information below in detail so you can better comprehend how the process works.
Table of Contents
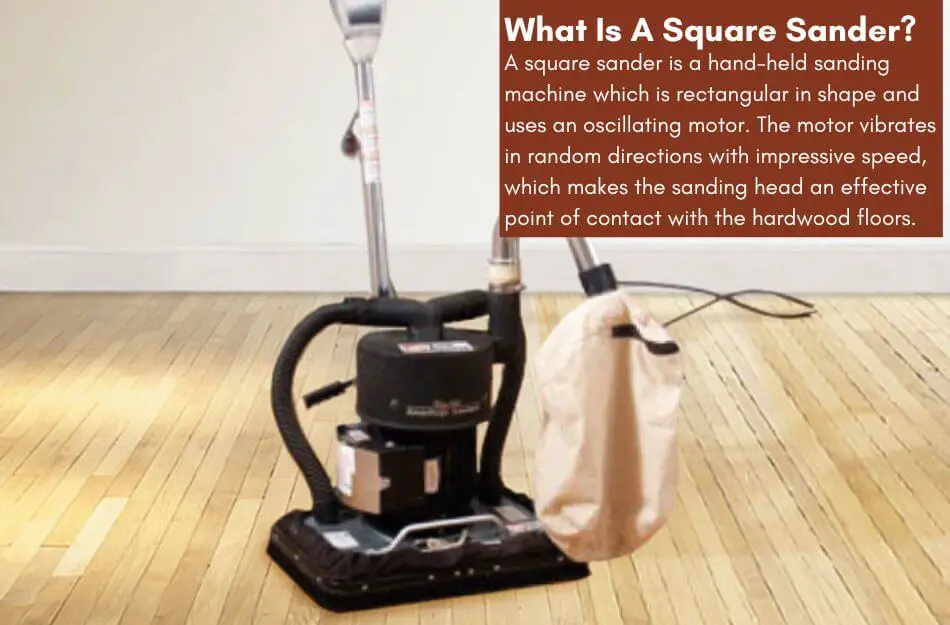
What Is A Square Sander?
A square sander is a hand-held sanding machine which is rectangular in shape and uses an oscillating motor.
The motor vibrates in random directions with impressive speed, which makes the sanding head an effective point of contact with the hardwood floors.
Another cool feature of the square sander is that it works in multiple directions, and you won’t have to be restricted to only moving forwards during your sanding sessions.
If you have chosen a square sander, you will surely be a great benefit as it is one of the most extensively used tools and is trusted by professional sanders and homeowners with experience handling such tasks.
Usually, sanders that feature random oscillation are ineffective because they can not withstand a decent amount of pressure or resistance.
However, this is not the case with the square sanders. The pad is fixed into place and tight enough that it can counter major resistance.
Besides, the oscillations’ speed adds to the machine’s strength, allowing it to grind through the resistance given either by the finish or the buildup layer.
Therefore, the square sander is considered an aggressive sanding machine suitable for almost all types of surfaces.
This is mainly due to the added level of control and stability it provides to the person operating it.
It also works great when removing finishes from old hardwood floors or clearing away all the dirt and dust that might have accumulated on the top of the floors.
Moreover, they can also make the sanding process quicker, as using high-grit sandpaper from the start can allow you to skip one step and save at least 30 minutes or more, depending on the size of your flooring.
In addition, square sanders feature a square edge, making them suitable for sanding down the corners of the floors and accessing cheeky spaces, which might not have been possible with other standard sanders.
If your floors are not finished, you can also sand unfinished hardwood floors.
How To Sand Hardwood Floors With A Square Sander?
Get Some Protective Gear
If you are sanding the floors using a square sander, you are using a hand-held machine which surely involves some risks which need to be countered beforehand.
Your safety must be your top priority before anything else; therefore, you must follow all the safety precautions for the best results.

Below is a list of all the gear you would need:
- Eyeglasses
- Industrial-grade gloves
- Respiratory mask
- Full sleeves shirt
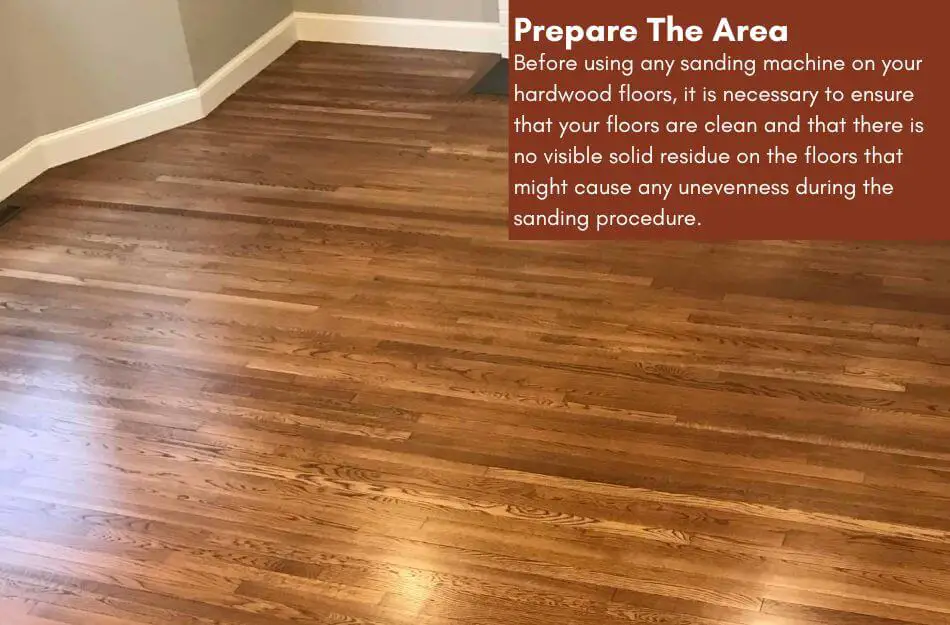
Prepare The Area
Before using any sanding machine on your hardwood floors, it is necessary to ensure that your floors are neat and clean and that there is no visible residue on the floors that might cause any unevenness during the sanding procedure.
Many people ignore this and sand over the dust and debris that might’ve collected on top of the floors.
They do not understand that this may create unevenness in the wood grain as the layer might be thick in some places and thin in others.
Hence, it is best to clean the floors with a wood cleaner and scrub the surface so the raw wood or the varnish is exposed, and then you can proceed towards sanding.
If there is only dry dust on the surface, you can use a vacuum cleaner to collect it.
Furthermore, as much sawdust will be in the air, ensure to ventilate the room properly by opening doors and windows.
The sawdust can irritate normal people after prolonged exposures and might even trigger allergies in a few.
Therefore, ensure that the room has decent ventilation and, if possible, open all doors and windows.
Comprehensive Guide On Sanding Hardwood Floors By Hand
Sand The Floors
After you have made all the necessary preparations, it is time to move to the actual sanding procedure.
Now that the sander is loaded with the right sandpaper, you can start from the farthest end of the room or the center and pan out to the edges.
An important point to note is that you must have sandpapers ranging from 40 grit to 180 grit if you want optimum results.
You shall start with the lowest rating and then move on to the higher one.

Another noticeable feature of the square sander is that it does not restrict one to the center or sides of the floors.
Though the name is square, it is rectangular, allowing it to effectively sand the edges and corners, which most of the sanders miss out.
Start sanding from your origin point and move to the end of one side until you come across the wall.
Ensure to maintain a moderate speed; going too slow can excessively sand the floors while going too fast might cause scratches and not properly sand the floors.
Once you reach the other end, please switch off the machine and turn around; then, change lanes and lower it again to start sanding the remaining surface.
Repeat this process until the floors have been sanded 2-3 times using the specific sanding paper.
After this, it is time to change the sanding sleeve and move to a higher grit for better sanding and targeting of the wood’s grain.
A recommended grain would be 100-grit for your hardwood floors to perform medium sanding.
You can also move directly to 120 or more if your floors demand a higher grit. Now, you will repeat the same procedure and give the floors a few rounds until you can stop for the next step.
If you have already used 120 grit or more, your process is complete; if not, you must take a few laps again by changing the sandpaper to a higher grit for a smoother finish on the wooden surface.
Lastly, clean the floors and collect the dust using a vacuum cleaner or a dry mop. After this, your sanding process is complete, and you can finish the floors if you want to.
Conclusion
Hardwood floors can be sanded down by a number of sanders including drum sanders and various types of handheld sanders.
However, using a square sander would be highly suitable for you as you would be able to properly target the edges of the hardwood floors which is usually not possible with other usual sanders.
Therefore, if you also have a pending sanding session for your hardwood floors, you can do that using a square sander and by following the guide given above.

As a co-creator of FlooringFlow.com, Emma Sophia comes on board to answer all your questions related to any flooring problems. Together with John Henry, she’s gained extensive experience in fixing many flooring problems in their own house as well as in friends and family’s. Now, she wants to share her knowledge that she gained during floor remodeling, restoring, and DIY projects.


