
Engineered wood flooring is one of the most popular among all types of flooring. Due to its exemplary strength and durability, people turn towards it so they can also achieve the same benefits in a very reasonable budget.
However, for those who have plywood floors already, they can save a lot more by installing the engineered wood on top of the plywood.
Not only will it save them the removal cost but the overall thickness and strength of the floors will also be significantly increased.
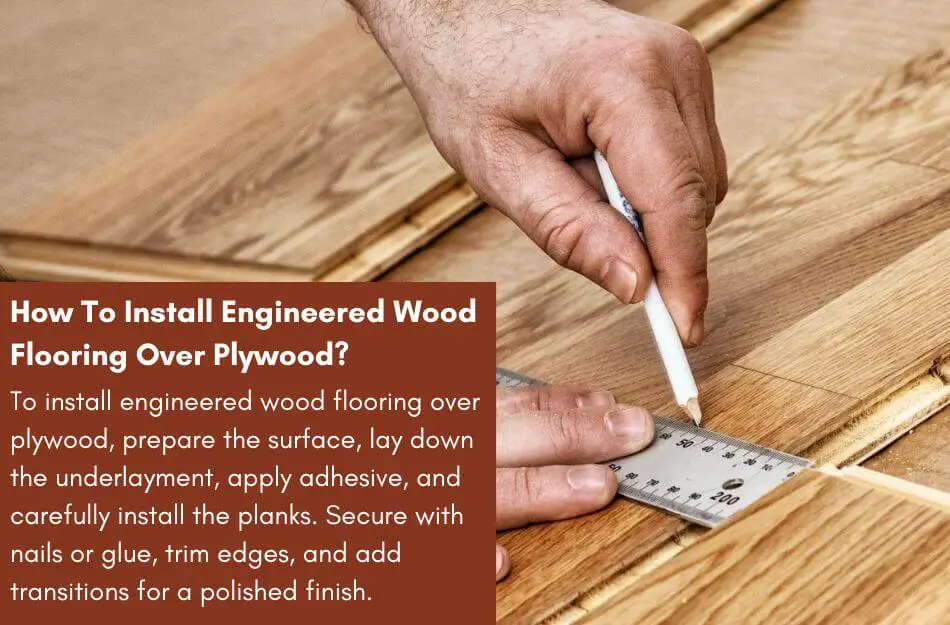
To install engineered wood flooring over plywood, prepare the surface, lay down the underlayment, apply adhesive, and carefully install the planks. Secure with nails or glue, trim edges, and add transitions for a polished finish.
However, the process is not as easy as it may sound, therefore, make sure you stick along as there is very useful information ahead.
Keep on reading so you don’t miss out on anything important.
Table of Contents
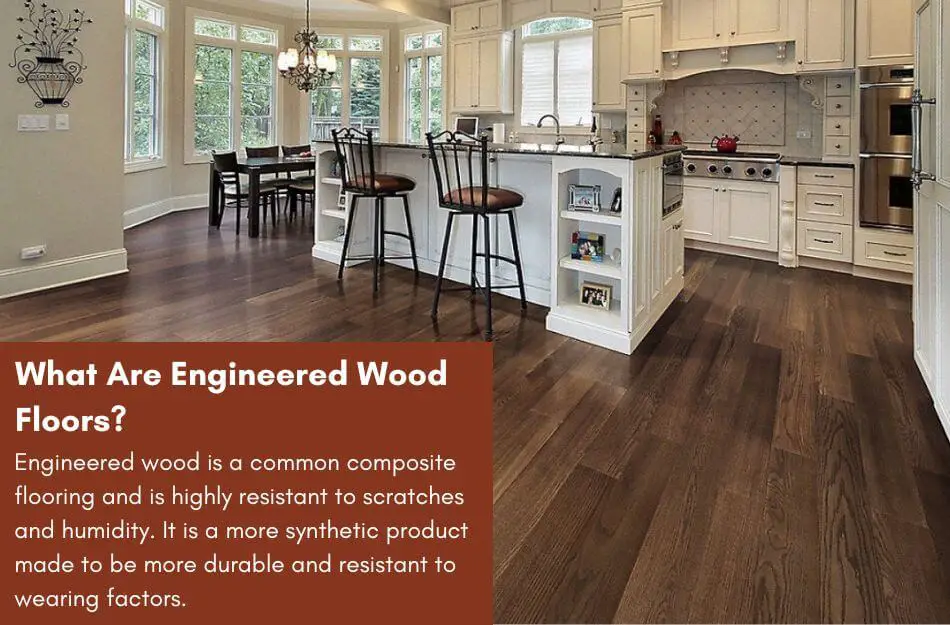
What Are Engineered Wood Floors?
Engineered wood is a common composite flooring and is highly resistant to scratches and humidity. It is also sometimes considered as a sub-type of hardwood.
Engineered wood flooring is made to be more durable and resistant to wearing factors.
While many think it is entirely synthetic and has no wood content, it’s not true.
Engineered wood floors have a core made from a small amount of hardwood combined with PVC, plastic, and other materials.
This makes it incredibly strong and prevents it from succumbing to everyday wear and tear.
Moreover, a veneer layer is on top, making it highly durable and protecting it against water content and increased moisture.
Many hardwood enthusiasts initially opposed it in recent years; engineered wood has gained popularity due to its many exciting features.
Along with its incredible strength and other factors, it offers versatility and variety in colors and designs for your home while offering additional durability and strength.
The main drawback of engineered wood was the composite materials used in it and the treatments it underwent.
But as time passed and people started to notice the amount of strength provided by the engineered wood in this scenario, they realized these materials add to the product’s strength and resilience.
Hence, making it a desirable choice for many homeowners. Another noticeable feature of engineered wood floors is the affordable price.
They offer an outstanding amount of quality at a very reasonable price, making it highly suitable for those who can’t afford the exquisite hardwood types but still want a similar experience.
This concludes that engineered wooden floors are a very reliable choice. But most people do not understand that, unlike usual hardwood flooring, it is straightforward to install and does not require too much time.
What Is Plywood?
Plywood is very similar to engineered wood and is a common type of flooring. It has a layered sheet structure made from layers or thin strands of wood veneers attached.
These are usually done by placing the wood grains at 90 degrees to each other. It is not a very common flooring option or is considered exquisite.

However, it was extensively used for various purposes due to its strength and other useful features.
It is still primarily used for outdoor purposes where the wooden look is preferred, but the homeowner does not want to spend too much on it.
Besides, it is also considered a healthy and desirable flooring option if you have a meager budget.
How To Install Engineered Wood Flooring Over Plywood?
Installing engineered hardwood over plywood is very easy as all you need to do is place the planks on top of the plywood subflooring, remove the brackets, trim the doors from underneath, and install the floors according to the desired method.
However, there is a lot more to these simple points, and if a proper procedure is not followed, you might end up getting your flooring ruined and may need to spend additional time and money to sort it out.
Therefore, we made a detailed guide for you to follow. Read the passage below and follow the steps to install engineered wood flooring over plywood without seeking professional help or damaging the wood.
Step 1: Acclimation
Once you have your floorboards, the most crucial step comes first. It would be best if you allowed the engineered wood to acclimate so that your wood will not cause any future irregularities in your floors.
While engineered wood is not entirely natural or does not have a high hardwood content, it still needs to acclimate a bit to match the moisture level in the air.
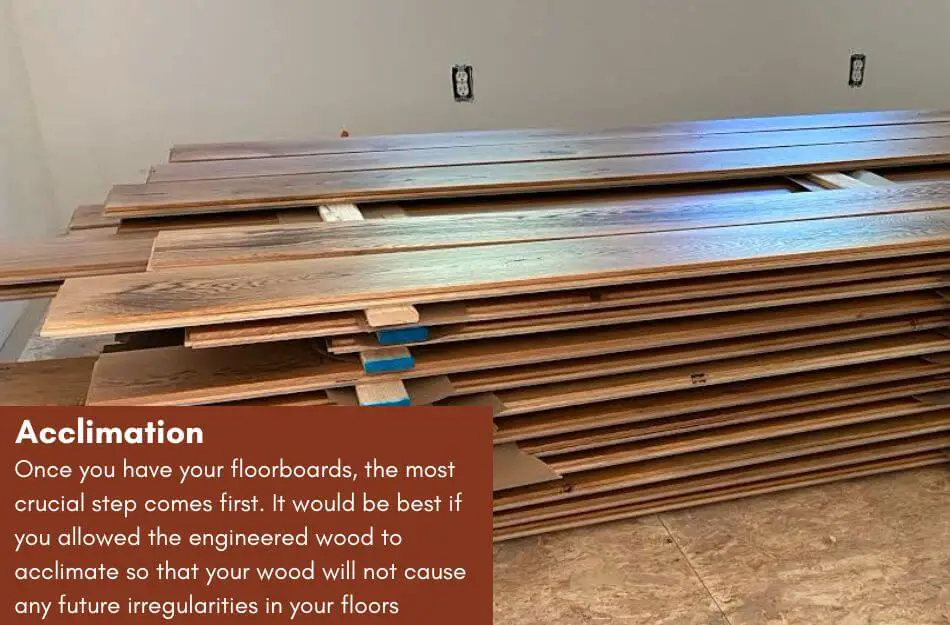
Therefore, you can either put the planks out of the box or, even better, lay them out in a few columns so they can better adjust to the environment.
Besides, this will also give you ample amount of time to work on the other necessary procedures.
The time required for the engineered wood to acclimate varies depending on the size of the boards, the manufacturer, and a few more factors.
While the recommended time is 1-2 weeks, you can use an accurate wood moisture meter to know the correct moisture content in the wood.
This will let you know precisely if the wood has acclimated or not.
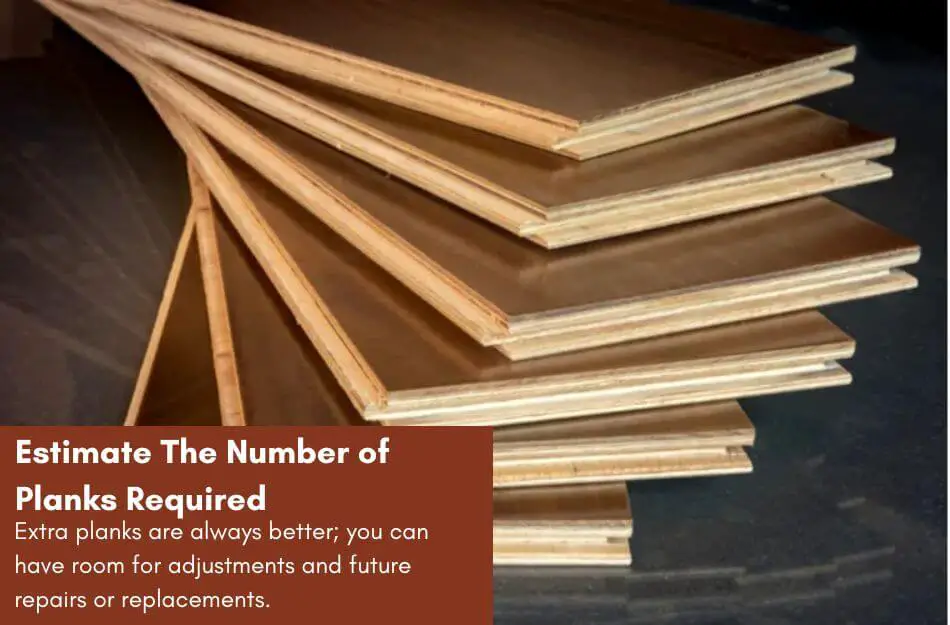
Step 2: Estimate The Number of Planks Required
Extra planks are always better; you can have room for adjustments and future repairs or replacements. But how would you determine the required number of planks or recommended extra?
Here is an easy way to find out:
- Simply measure the area of the room in square feet.
- Divide this by the area of the flooring plank or the number printed on the box. You can add 0.2-0.4mm of spacing on each side of the plank and then find out the area to give room for expansion.
- This will give you a rough estimate, and it is recommended to get 10% extra flooring to be on the safe side and have stock for future repairs or replacements.
Your further proceedings will be much easier once you have the required planks and extra. Besides, laying down the engineered wood on plywood will also be very easy.
Step 3: Look Out For Door Jams
Door jams are one of the most common problems when installing engineered wood flooring over plywood.
The reason is that due to the addition of flooring material on top of the previous one, the height of the floors increases by 2-3 inches depending upon the thickness of the floors and any other layering used.
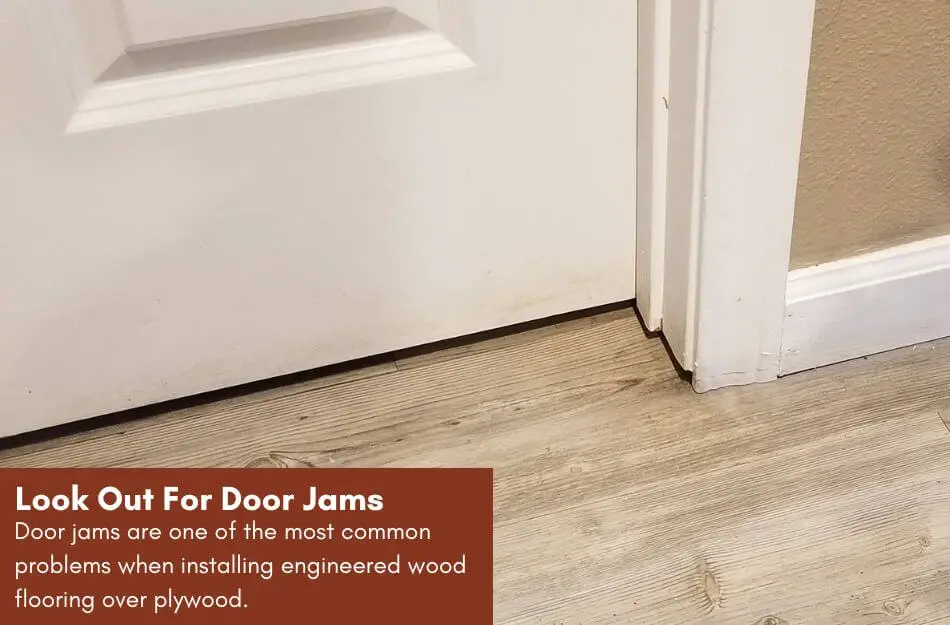
This makes the doors lower than the flooring level, which jams the doors in their place. Therefore, placing a few planks on the surface and measuring their combined height is good.
If not possible for both, check the height of the engineered wood plank and note it down.
Add their height to get a collective figure if you use any underlayments. Add 0.5 – 0.75 inches to this figure.
Then, measure this height from the bottom of the floors (plywood) and see where it goes on the door. Mark the area and shorten the doors to that point.
You might need to unhinge the doors and use a saw to perform this task efficiently. Sanding it down afterward and using lacquer to restore the original appearance.
Repeat the same process for the door jambs if you plan on extending the flooring to the outer area.
Step 4: Get An Underlayment
Now that you have ample space all around, it is time to get an underlayment over the plywood. Both materials are wood so they will make a hard and stiff surface underneath.
Besides, there can be a lot of hollow noises and gritting of the wooden planks singing each other. In addition, any stored moisture in the plywood might damage the engineered wood floors.
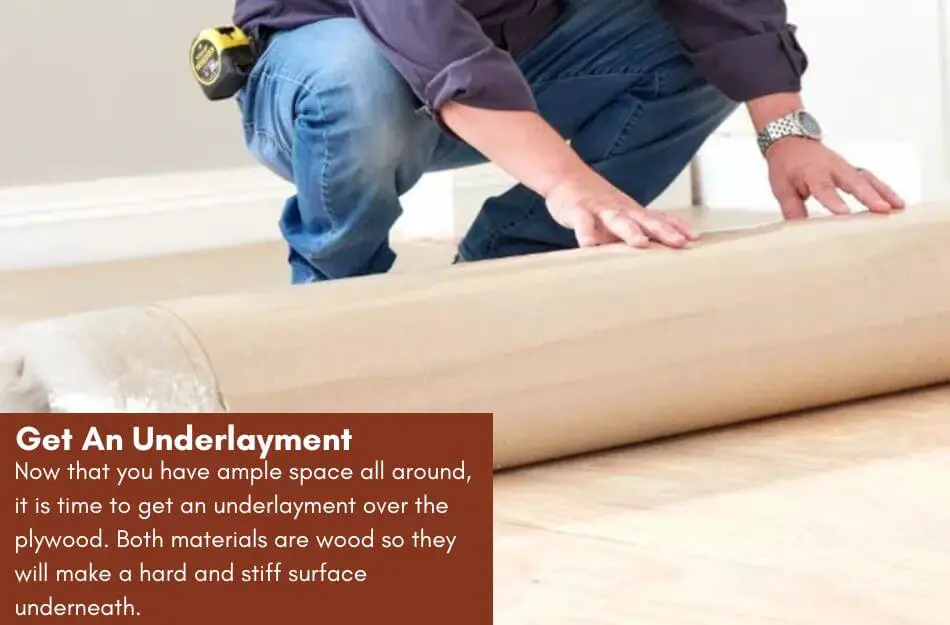
Therefore, it is best to get an underlayment between the two surfaces so they can be protected and a cushioning effect can be attained under the feet.
Getting an underlayment for your engineered wooden floors has many more benefits. These are as follows:
- This will also help ensure that the manufacturer can not cancel your warranty for violating the policies.
- Similarly, in case of any damage, your insurance company won’t be able to deny your claims on these grounds.
- Installing an underlayment will also help make the subfloors despite any existing irregularities.
- These will prevent hollow sounds from the surface of the floors and won’t make any echo when you step on the floors.
- A soft surface under the feet will be achieved, which makes walking more comfortable.
- Any moisture from above or below the ground cannot pass through.
- Heat is not allowed to pass through either side. Therefore, effective insulation of the floors is administered.
Once you have a suitable underlayment installed, you are done with most of the preliminary processes, and it is now time to install the engineered wood floors.
Step 5: Install The Planks
Installing the planks can be tricky if you do not know the correct method. As there are various ways you can install engineered wood floors over plywood, it is highly possible that you might get confused.
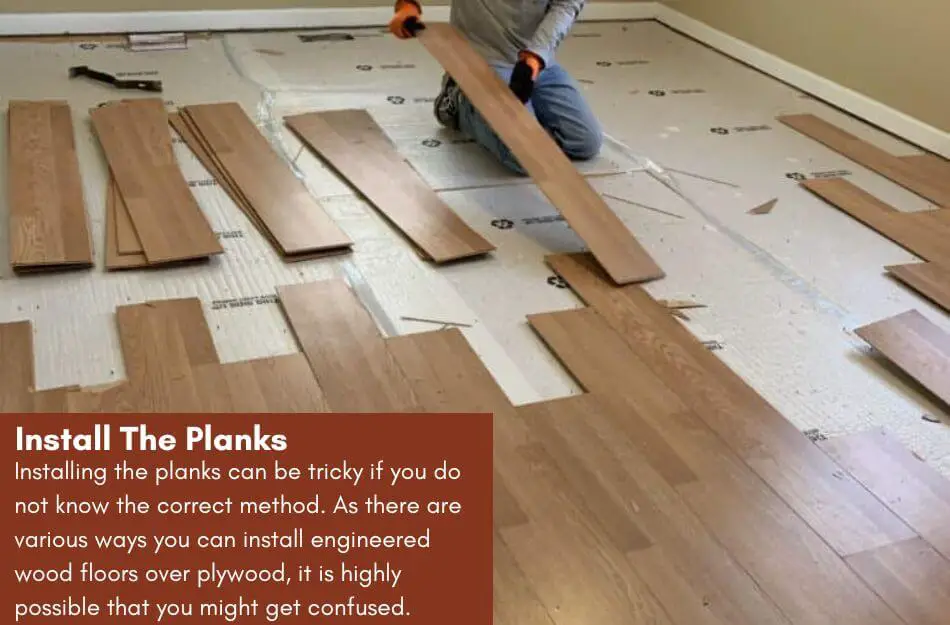
However, the best way is to follow the method the manufacturer recommends. You can find this in either the user manual or on the box.
You might be wondering about the various installation methods, but worry not, as we will elaborate on all of them for you.
Glue-down Installation
One of the most common forms of installing engineered wood floors over plywood is this. You must apply a suitable wood adhesive on the underlayment and the bottom of the wooden planks.
Once you have applied the glue, you must start placing the engineered wood boards on the surface.
Make sure only to glue the area you are working on, or you might end up with dried glue all over the underlayment.

Besides, lay down the planks according to the spacing and measurements you calculated earlier.
This will allow you to complete the process faster. Make sure to press the boards once they are laid down so no air gaps are formed.
When all the planks have been installed, you must ensure no air pockets in the adhesive layer.
To prevent this, you must use a 100-pound roller and roll it on the floors 6-7 times to ensure proper grip by the adhesive.
Floating Floors
Another common type of flooring installation is the floating floors. This is one of the most efficient and popular types of installation methods among engineered floorings.
The technique uses tongue and groove locks which click into each other so the two planks are connected to each other.
This type of floor relies on the surface area and the entire floor’s weight for the structure’s stability and integrity. Besides, the installation is also straightforward.
All you must do is lay down a plank and see the position of the lock. Then take another plank and click them together to form a firm grip.
However, if the length or width is too great in any area, you may cut the excess area with a saw.
It is always preferred that you start the installation project from one corner of the room so that it is easy to expand to the other sides.
Lay down one brown and then move towards another. Give the lock a good press with your hands and prevent using unnecessary force.
Screw & Nail Installation
Perhaps the most sturdy and reliable of all installation methods, this technique is widely used among engineered floors, especially in areas where excessive traffic is expected.
You will follow the same initial principle according to the floating floors.
But the only difference is that once the first row has been installed, you will need 2-3 inch nails and screws, which will be driven into the planks down to the plywood subfloor.
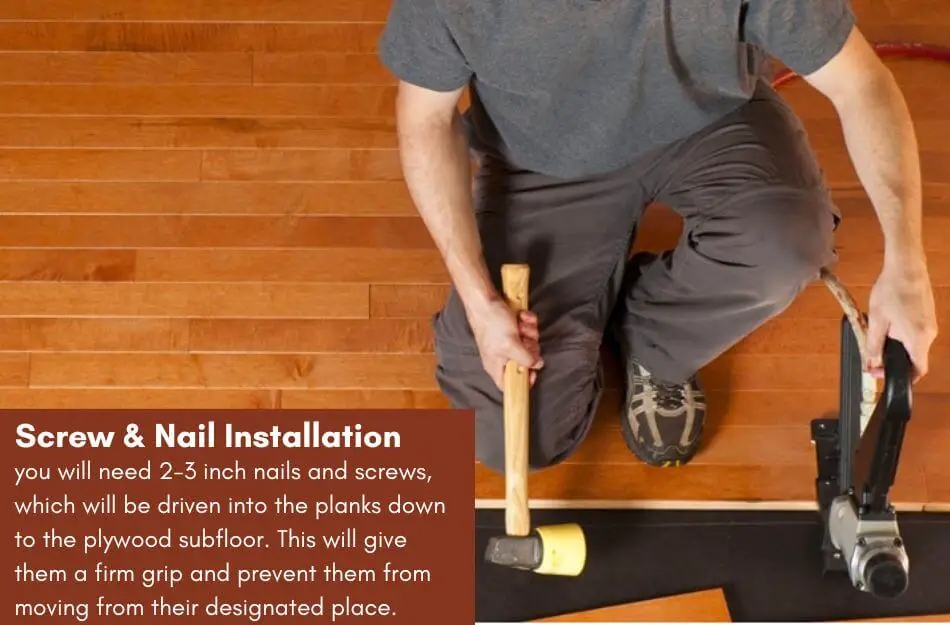
This will give them a firm grip and prevent them from moving from their designated place.
The length and type of the nails or screws being used will be determined according to the instructions given by the manufacturer.
Repeating the same process for all the rows, you will install the entire flooring in your room or the area in the gallery and the rest of the house.
Again, you will cut down the extra length of the plans to make them fit into corners or angled areas.
Bottom Line
Installing engineered floors over plywood is a very suitable idea if you want to save costs and get an extra durable floor.
Both of these materials are highly resistant to damage and can withstand great amounts of loads.
Therefore, if you are planning on getting these installed in your house, you are certainly making the right decision.
However, if you want more guidance related to the installation process, our step-by-step guide above will help you with that.
Make sure to read it thoroughly and follow the steps precisely to have an efficient installation of the engineered wood on your plywood floors.
If you have tried this method already, or plan to do so, let us know how your experience was and what difficulties you have to face during it.
John Henry is a passionate co-creator of FlooringFlow.com. a website dedicated to answer all of your flooring related questions. After taking the challenges of flooring DIYs while learning skills for years, John is now ready to share his knowledge related to floor remodeling and projects with you.


